PulseGrid - Website Uptime Monitoring WordPressPulseGrid - Website Uptime Monitoring WordPress
Monitor multiple websites with a private distributed network, real-time email alerts, and centralized reports.PulseGrid - Website Uptime Monitoring WordPress
Monitor multiple websites with a private distributed network, real-time email alerts, and central...
Screenshots


Overview
Designed for agencies, developers, and businesses that manage multiple websites, PulseGrid provides a self-hosted alternative to third-party monitoring services.
The central management interface is in WordPress, while monitoring covers any public website.
By deploying agents on different WordPress instances, you build a resilient, redundant grid that ensures accurate regional monitoring and full visibility across your client portfolio.
Features
Key Benefits
- Self-hosted uptime monitoring without relying on external services.
- Redundancy and regional coverage with distributed monitoring agents.
- Centralised management and reporting directly inside WordPress.
- Email alerts for real-time incident detection.
- Detailed performance and uptime reports are stored in the admin for long-term insights.
- Easy to scale. Add more agents to extend coverage and reliability.
Main Features
- Centralised Dashboard - Manage workers, monitored sites, notification settings, and reports from one place.
- Distributed Monitoring - Deploy worker agents on separate WordPress instances for redundancy and geographic accuracy.
- Worker Status Tracking - Monitor agent health (online, offline, maintenance) at a glance.
- Configurable Site Checks - Define custom intervals, timeouts, and error types for each monitored site.
- Email Notifications - Get instant alerts when a site goes down or an agent has issues.
- Admin Reports - Review detailed uptime logs, historical performance, and incident summaries.
- REST API - Secure communication between the central server and agents for seamless data aggregation.
- Agent Offline Support - PulseGrid automatically allocates websites when one of the workers goes offline.
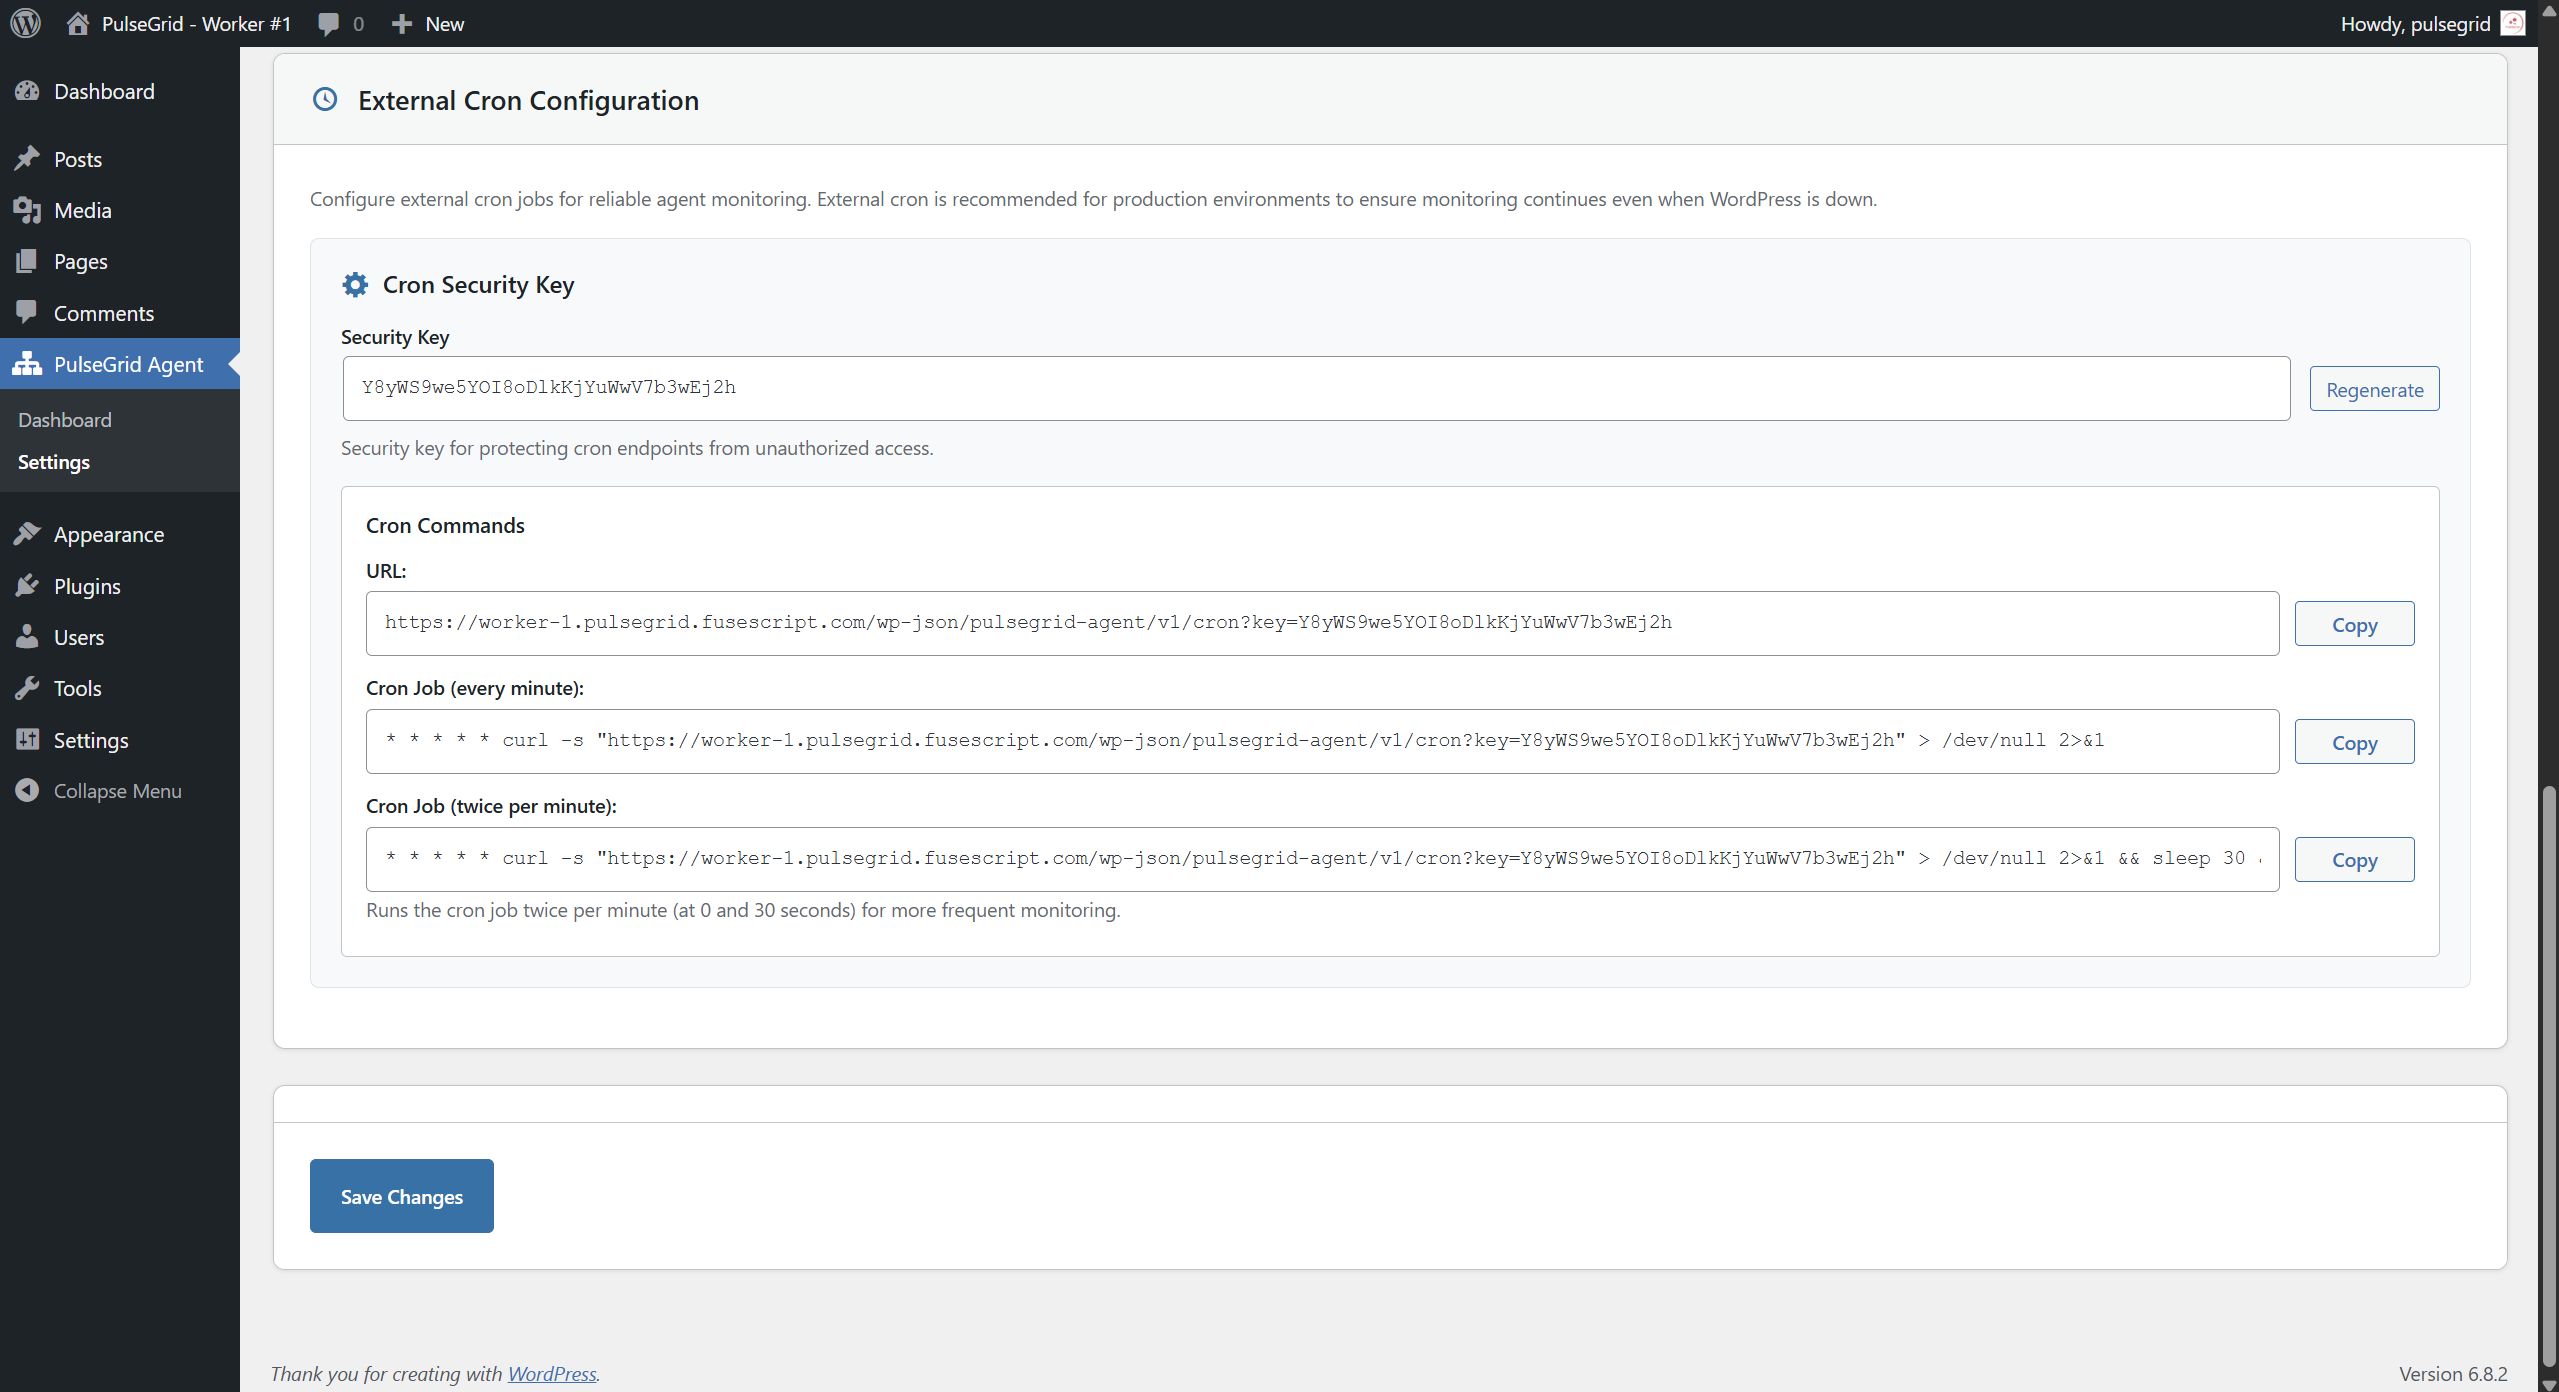
- Database & Cron Jobs - Automated scheduling of checks and synchronisation with robust data storage.
Requirements
Core Requirements
- WordPress Version: 6.0 or higher (tested up to 6.8.2)
- PHP Version: 8.0 or higher
Server Requirements
- HTTPS Support: Required for all inter-service communication between PulseGrid and worker nodes
- SSL/TLS: Valid SSL certificate for secure API communication
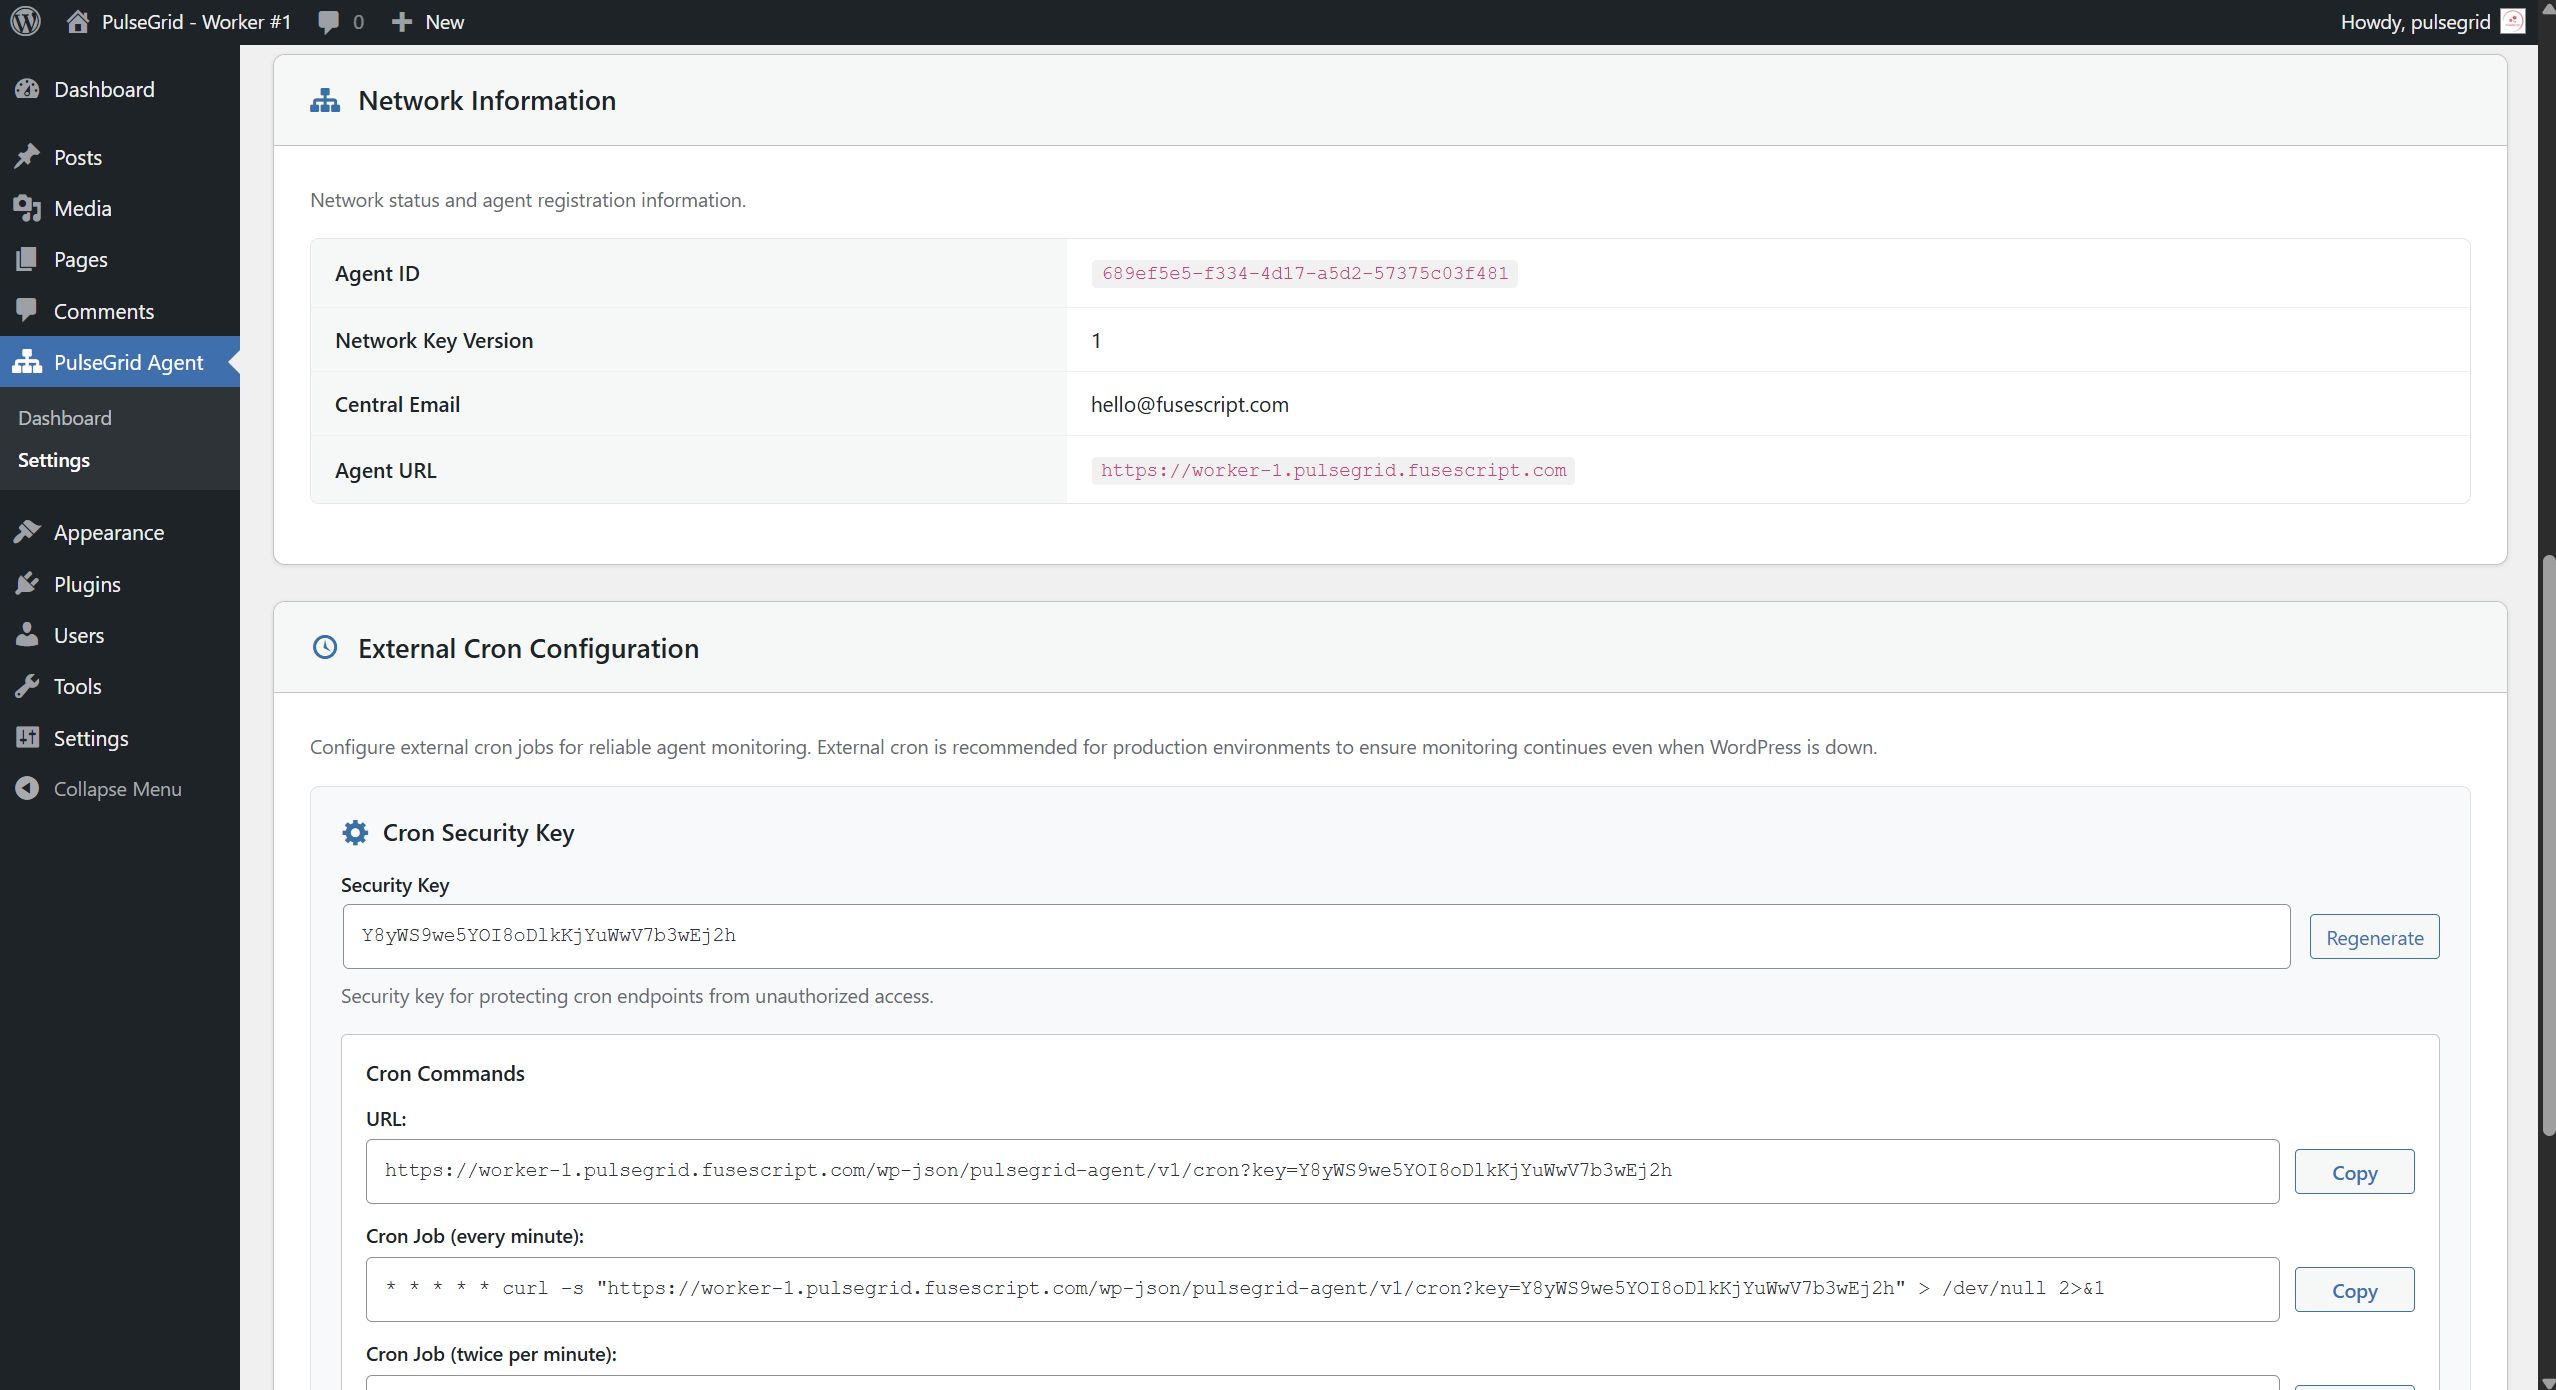
- Cron Jobs: External cron support (system cron or similar) for automated monitoring tasks
- Memory: Minimum 256MB PHP memory limit (512MB recommended for optimal performance)
- Disk Space: Minimum 100MB free space for logs and database storage
PHP Extensions (Standard WordPress requirements)
curl- For HTTP requests to monitored sitesjson- For API data handlingmbstring- For multibyte string processingopenssl- For HMAC authentication and SSL verification
Network Requirements
- Outbound HTTPS: Ability to make HTTPS requests to monitored websites
- Inbound HTTPS: For worker nodes to communicate back to PulseGrid
Infrastructure Requirements
- Custom headers must be allowed through all network layers
- X-PG-Signature - HMAC signature for request authentication
- X-PG-Timestamp - Unix timestamp for replay attack prevention
- X-PG-Worker-ID - Worker node unique identifier
Instructions
A) Installation
Important: PulseGrid consists of two plugins that work together to provide distributed website monitoring:
- PulseGrid - Central Command plugin that manages monitoring workers and provides a unified dashboard
- PulseGrid Agent - Monitoring worker plugin that performs actual website checks
A.1) Installing PulseGrid Central Command
Install this on your main WordPress site, which will act as the monitoring coordinator:
-
Manual Installation
- Unzip the
pulsegrid.zipfile and upload thepulsegridfolder to/wp-content/plugins/ - In your WordPress admin panel, go to Plugins
- Locate the PulseGrid plugin in the list and click Activate
- Unzip the
- Using The WP Admin
- In your WordPress admin panel, go to Plugins -> Add New
- Click the Upload Plugin button
- Select the
pulsegrid.zipfile and click Install Now - Once the installation is complete, click Activate Plugin
A.2) Installing PulseGrid Agent Workers
Install this on separate WordPress sites that will act as monitoring workers:
-
Manual Installation
- Unzip the
pulsegrid-agent.zipfile and upload thepulsegrid-agentfolder to/wp-content/plugins/ - In your WordPress admin panel, go to Plugins
- Locate the PulseGrid Agent plugin in the list and click Activate
- Unzip the
- Using The WP Admin
- In your WordPress admin panel, go to Plugins -> Add New
- Click the Upload Plugin button
- Select the
pulsegrid-agent.zipfile and click Install Now - Once the installation is complete, click Activate Plugin
Note: You can install both plugins on the same WordPress site for testing, but for production use, it's recommended to have the agent workers on different servers/locations for true distributed monitoring.
B) PulseGrid Central Setup
Configure the central command plugin that will coordinate all monitoring activities.
Initial Configuration
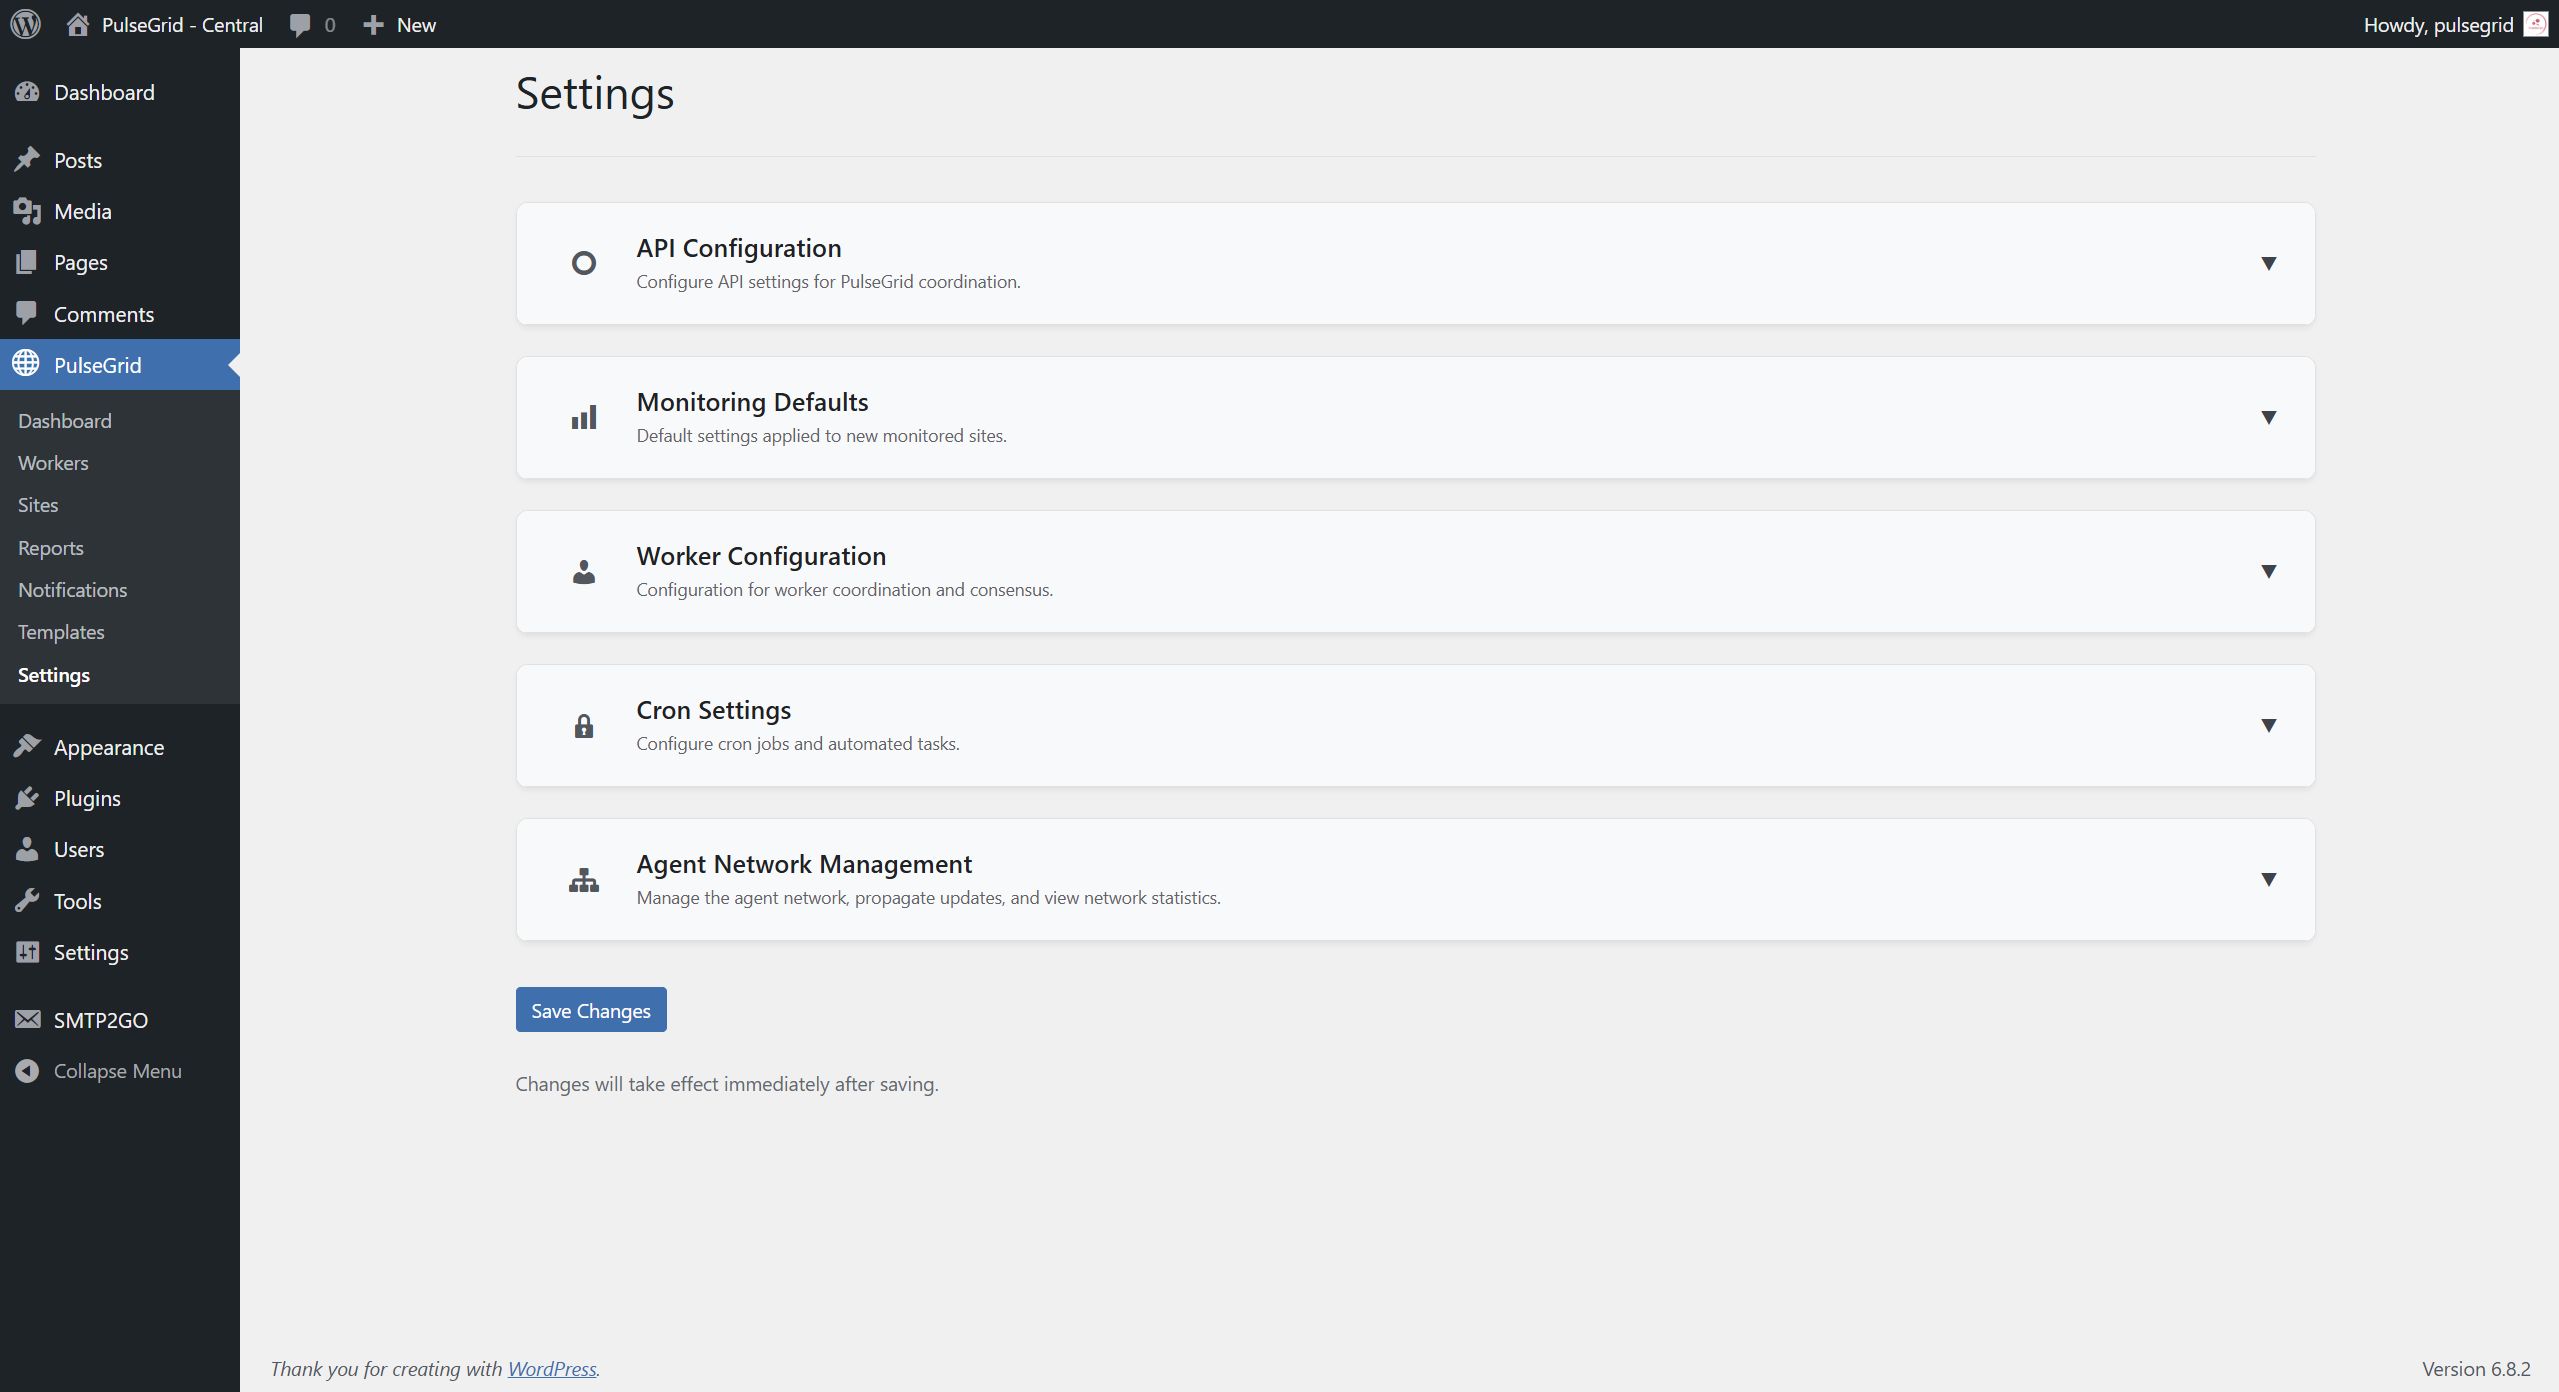
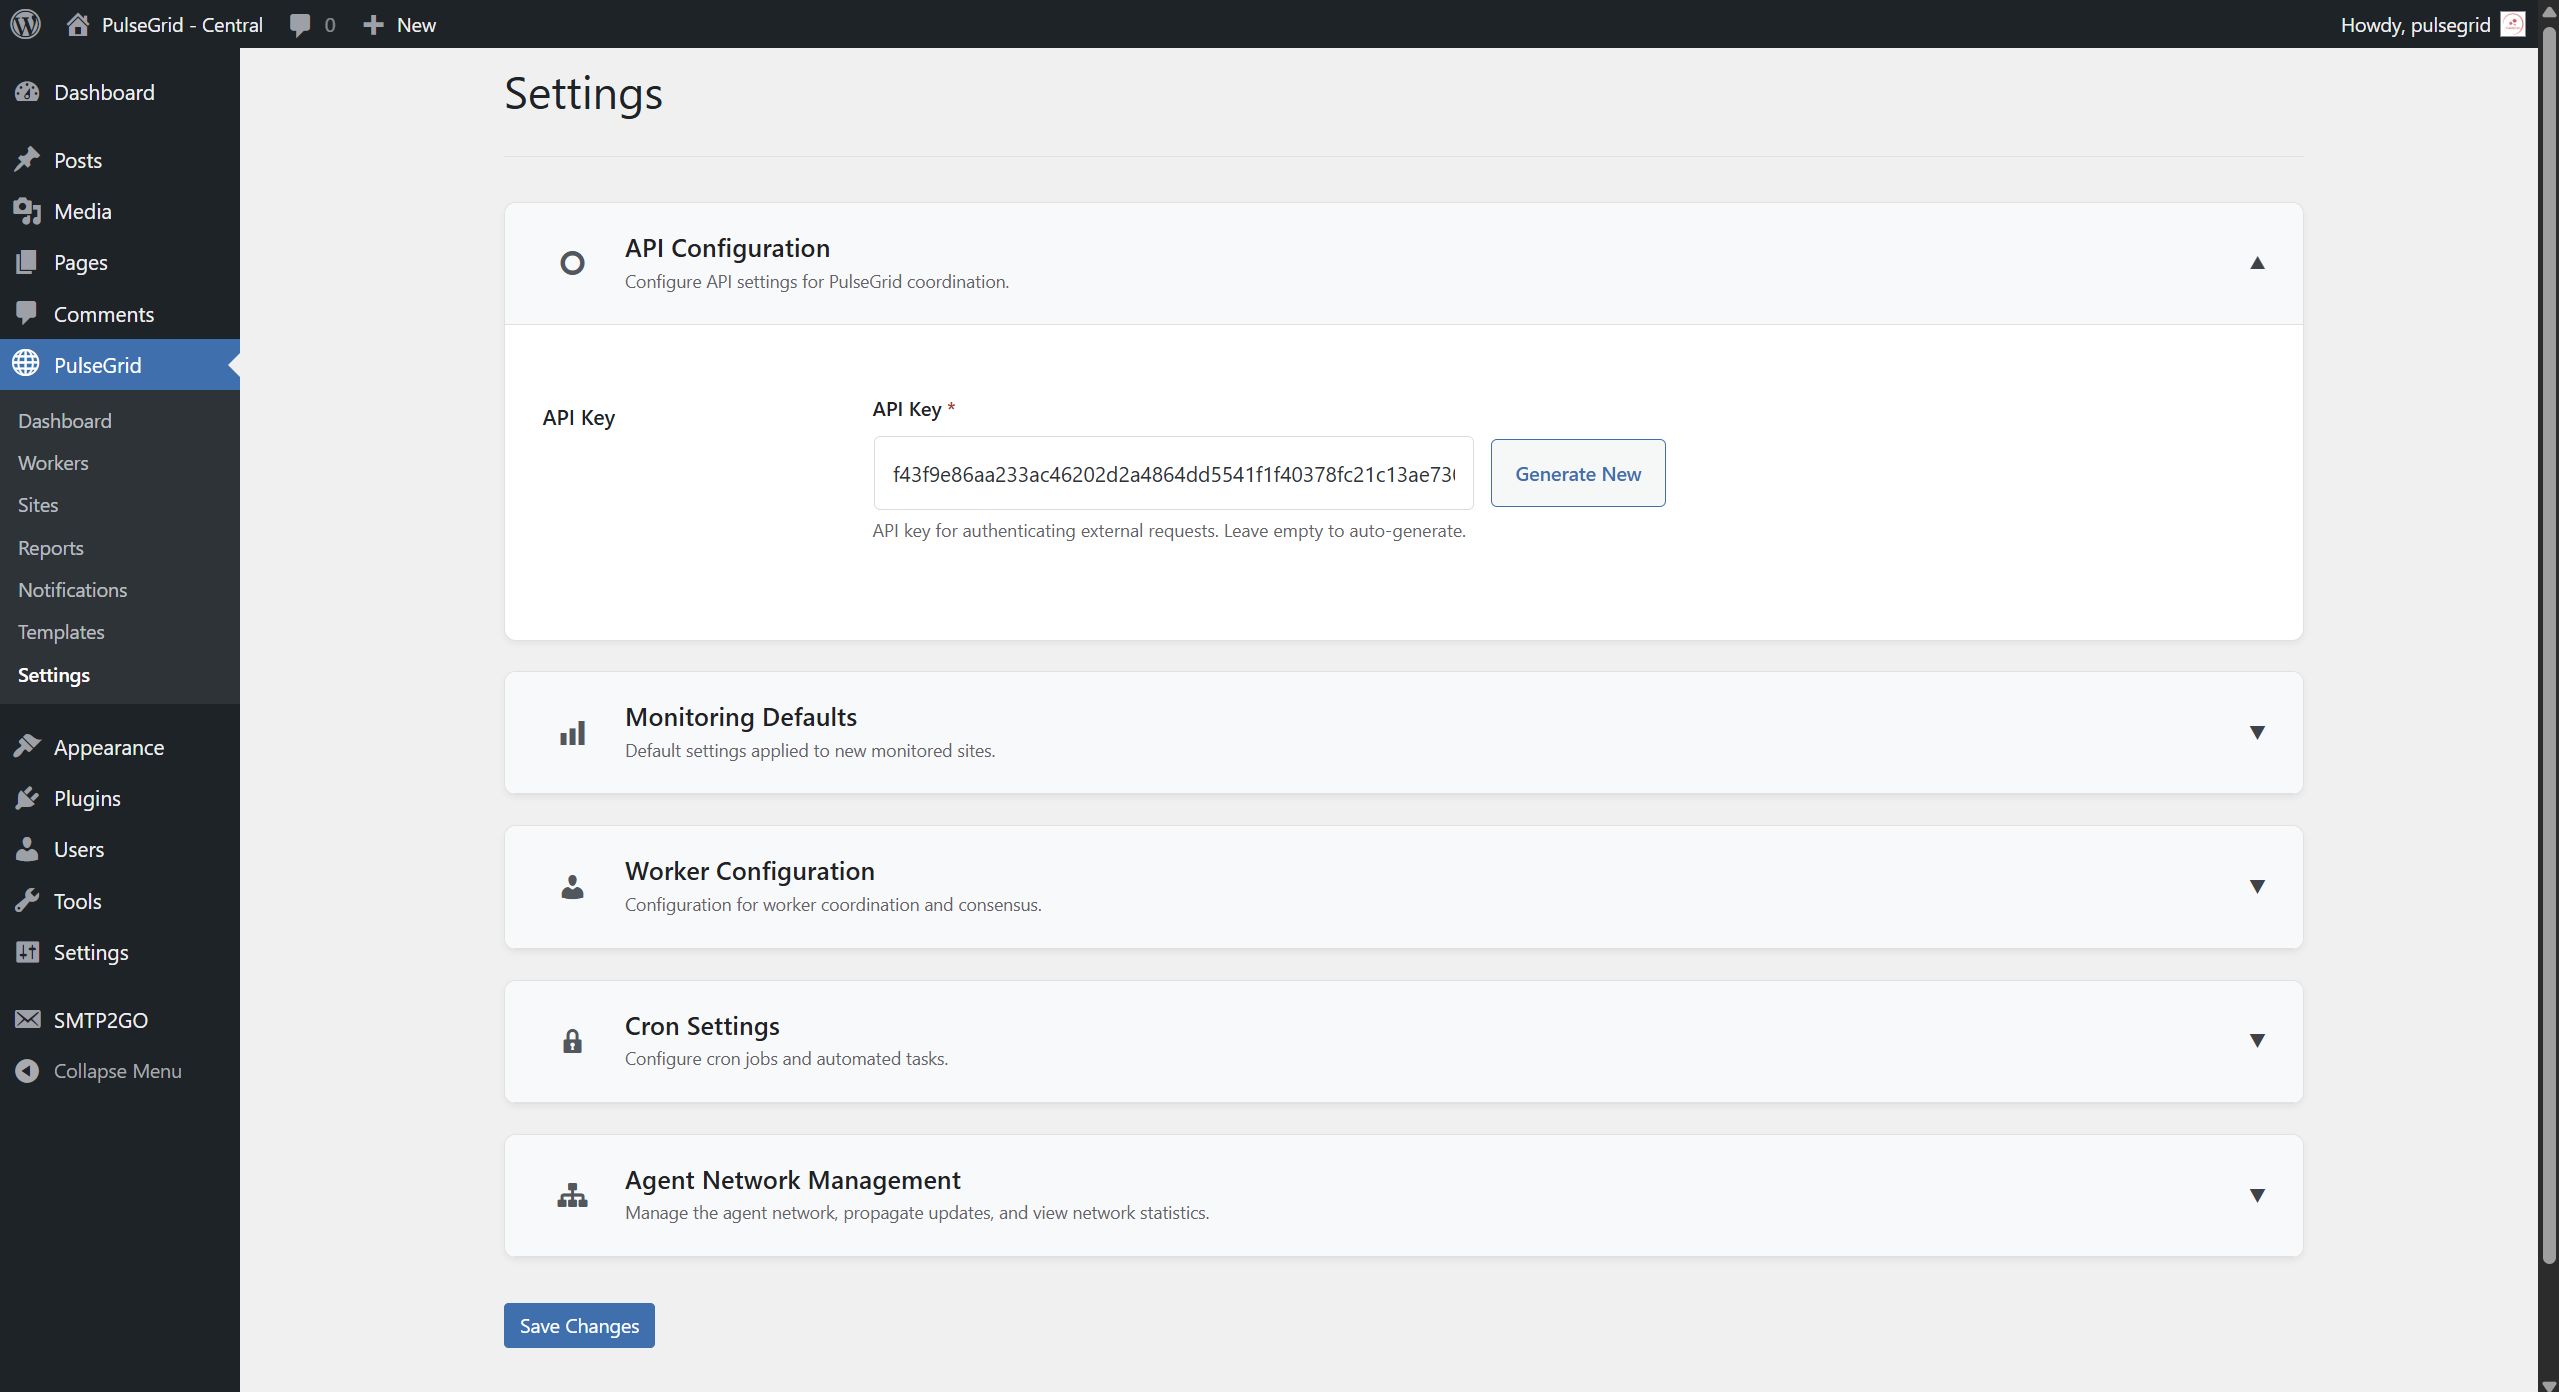
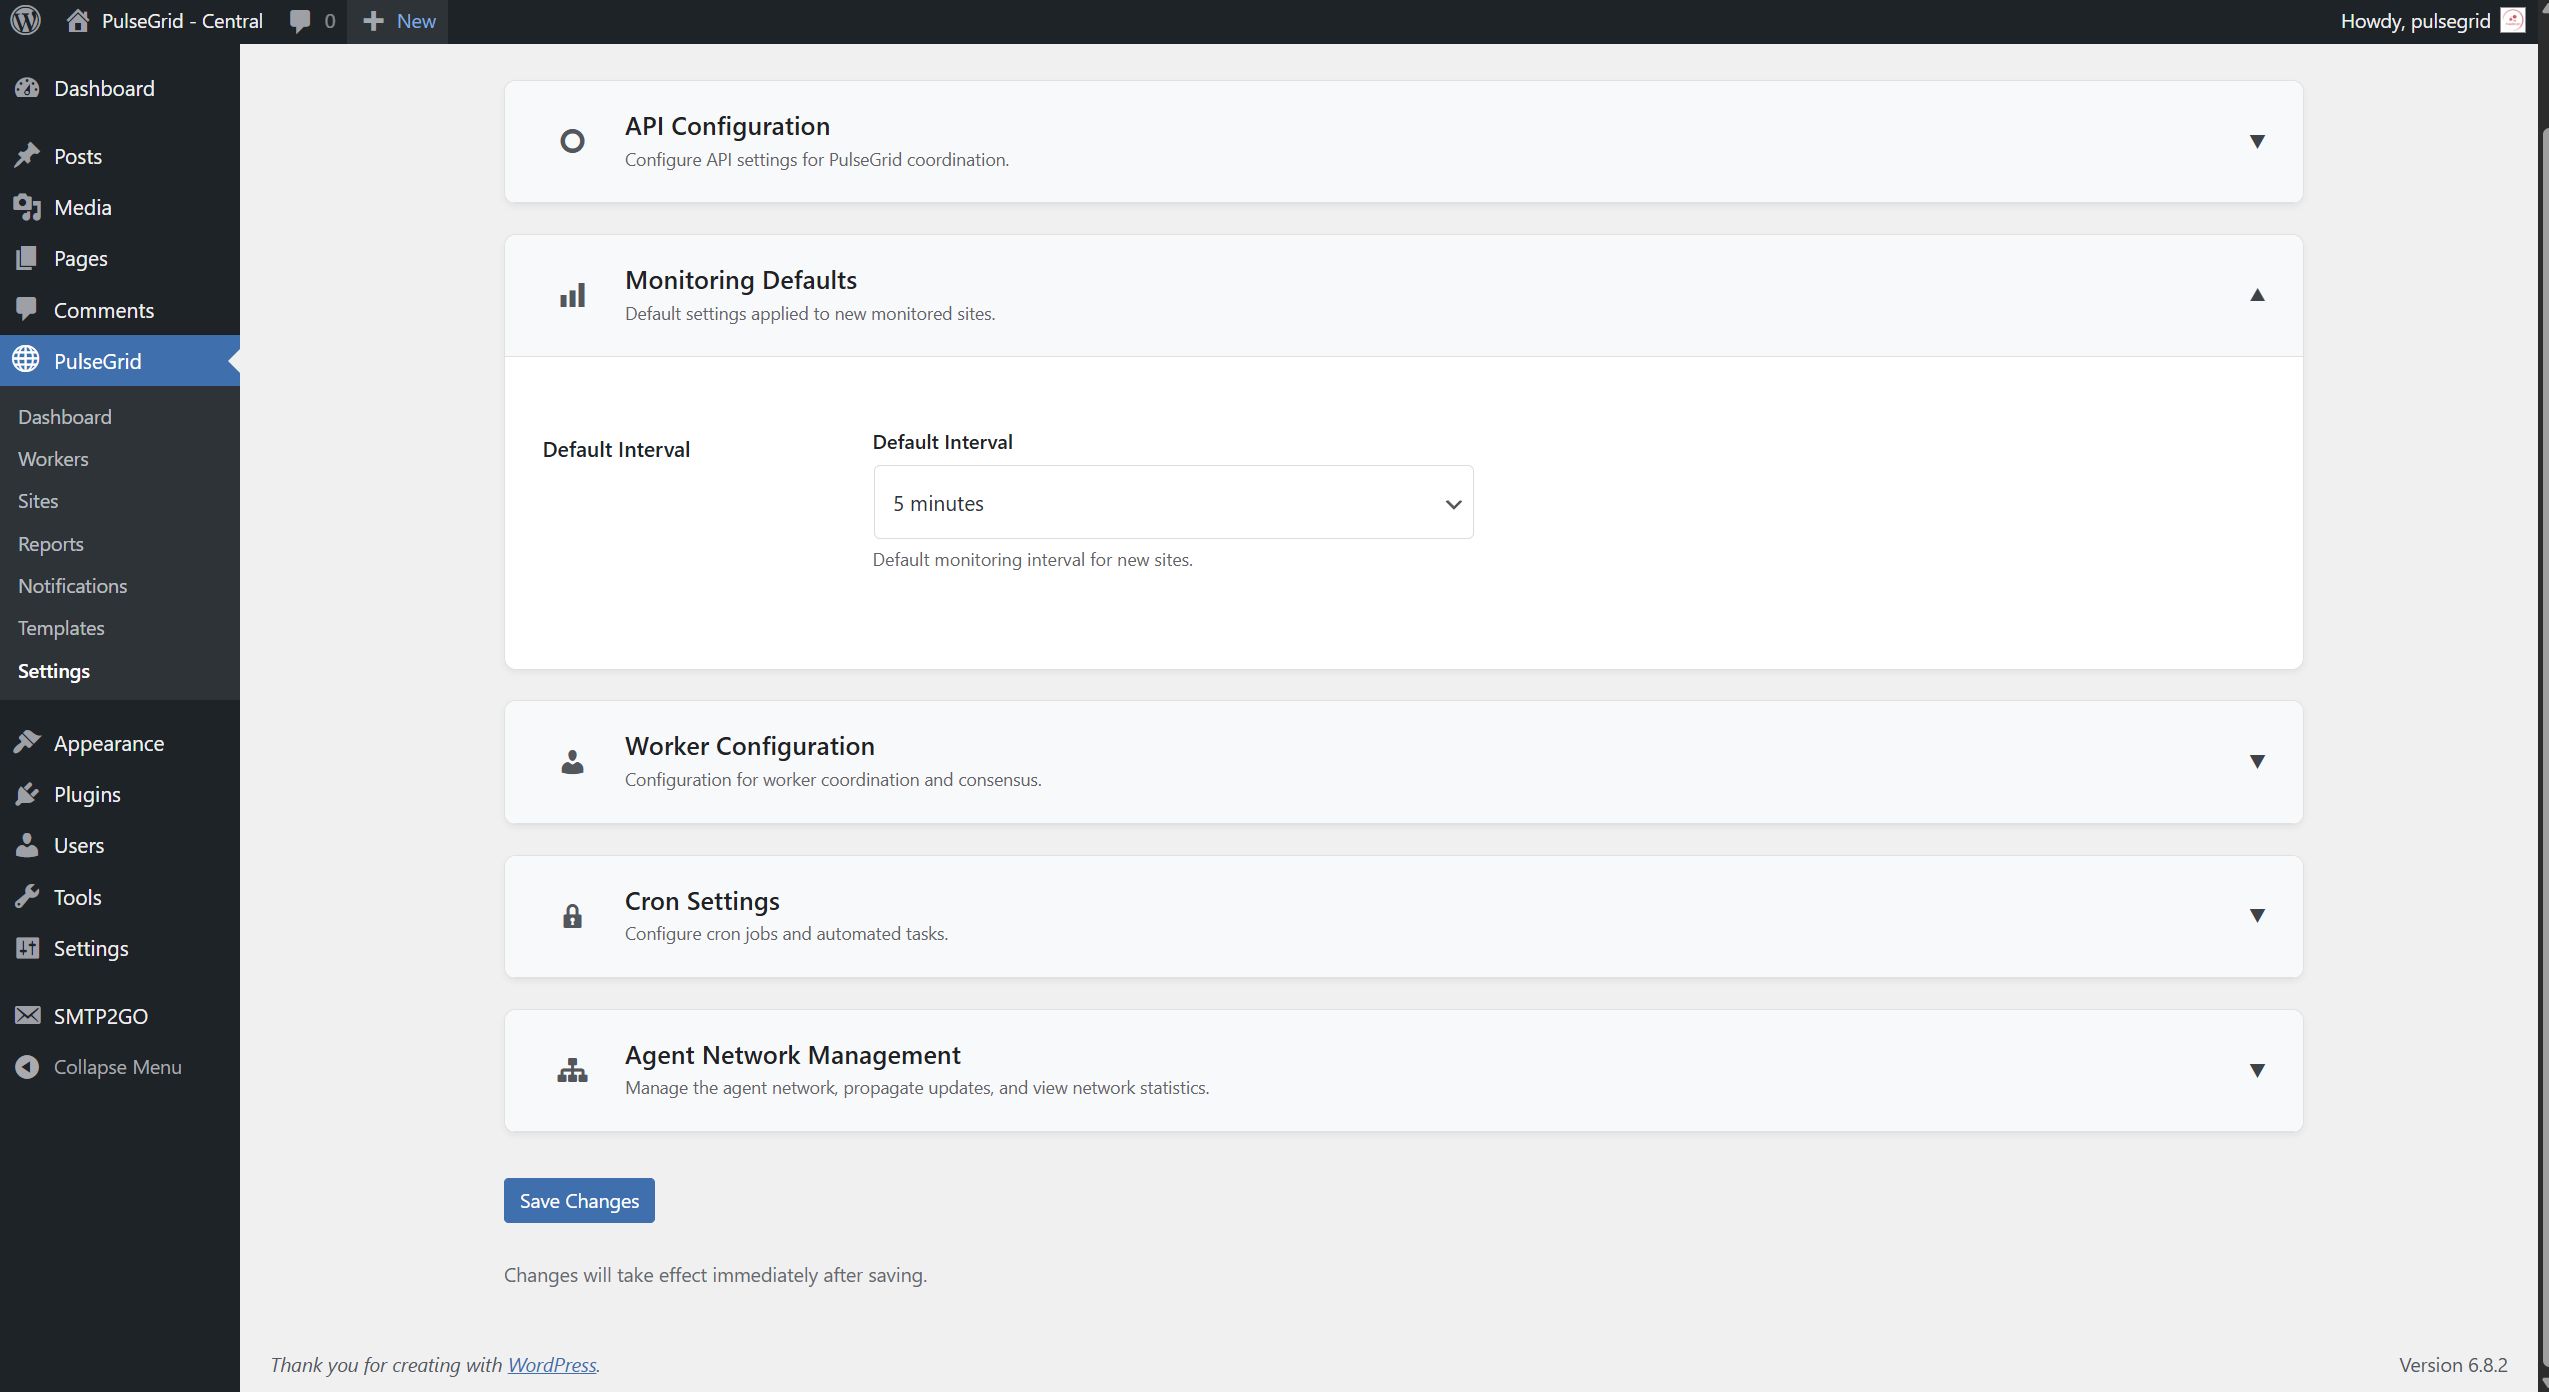
- After activating PulseGrid, go to PulseGrid -> Settings in your WordPress admin
- Configure the following essential settings:
- Central Email: Email address for system notifications (defaults to admin email)
- API Key: Secure key for worker communication (auto-generated)
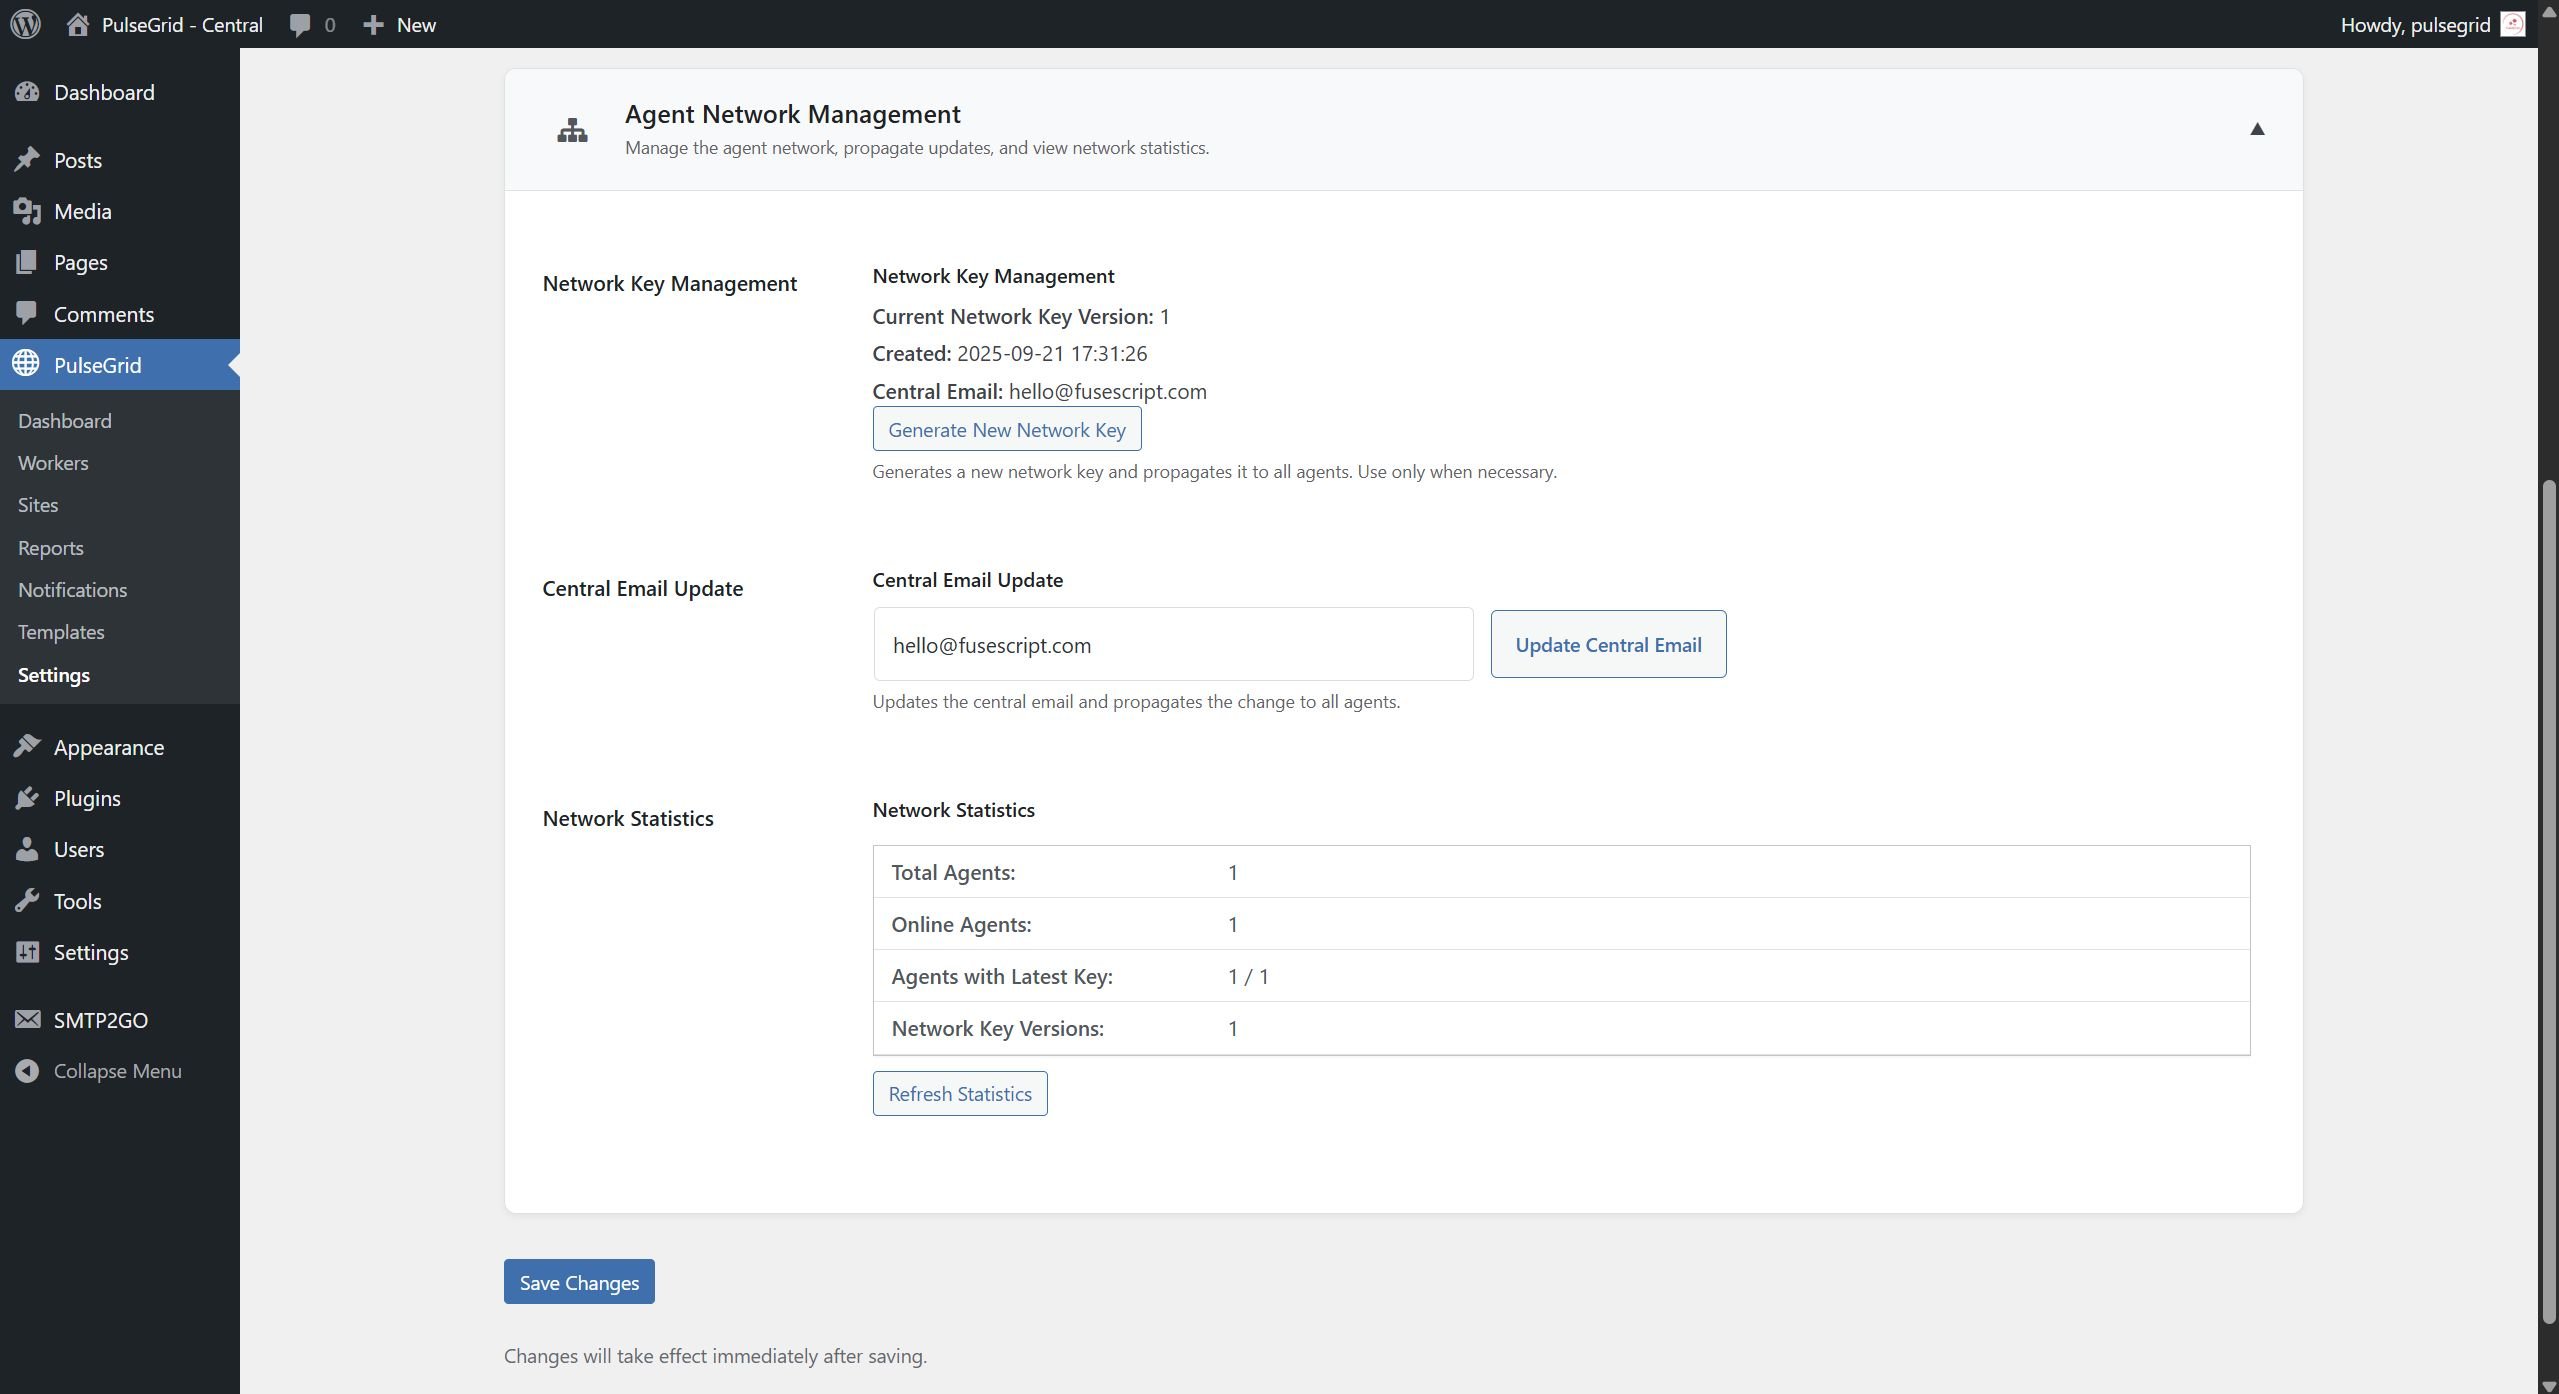
- Network Key: Encryption key for secure network communication
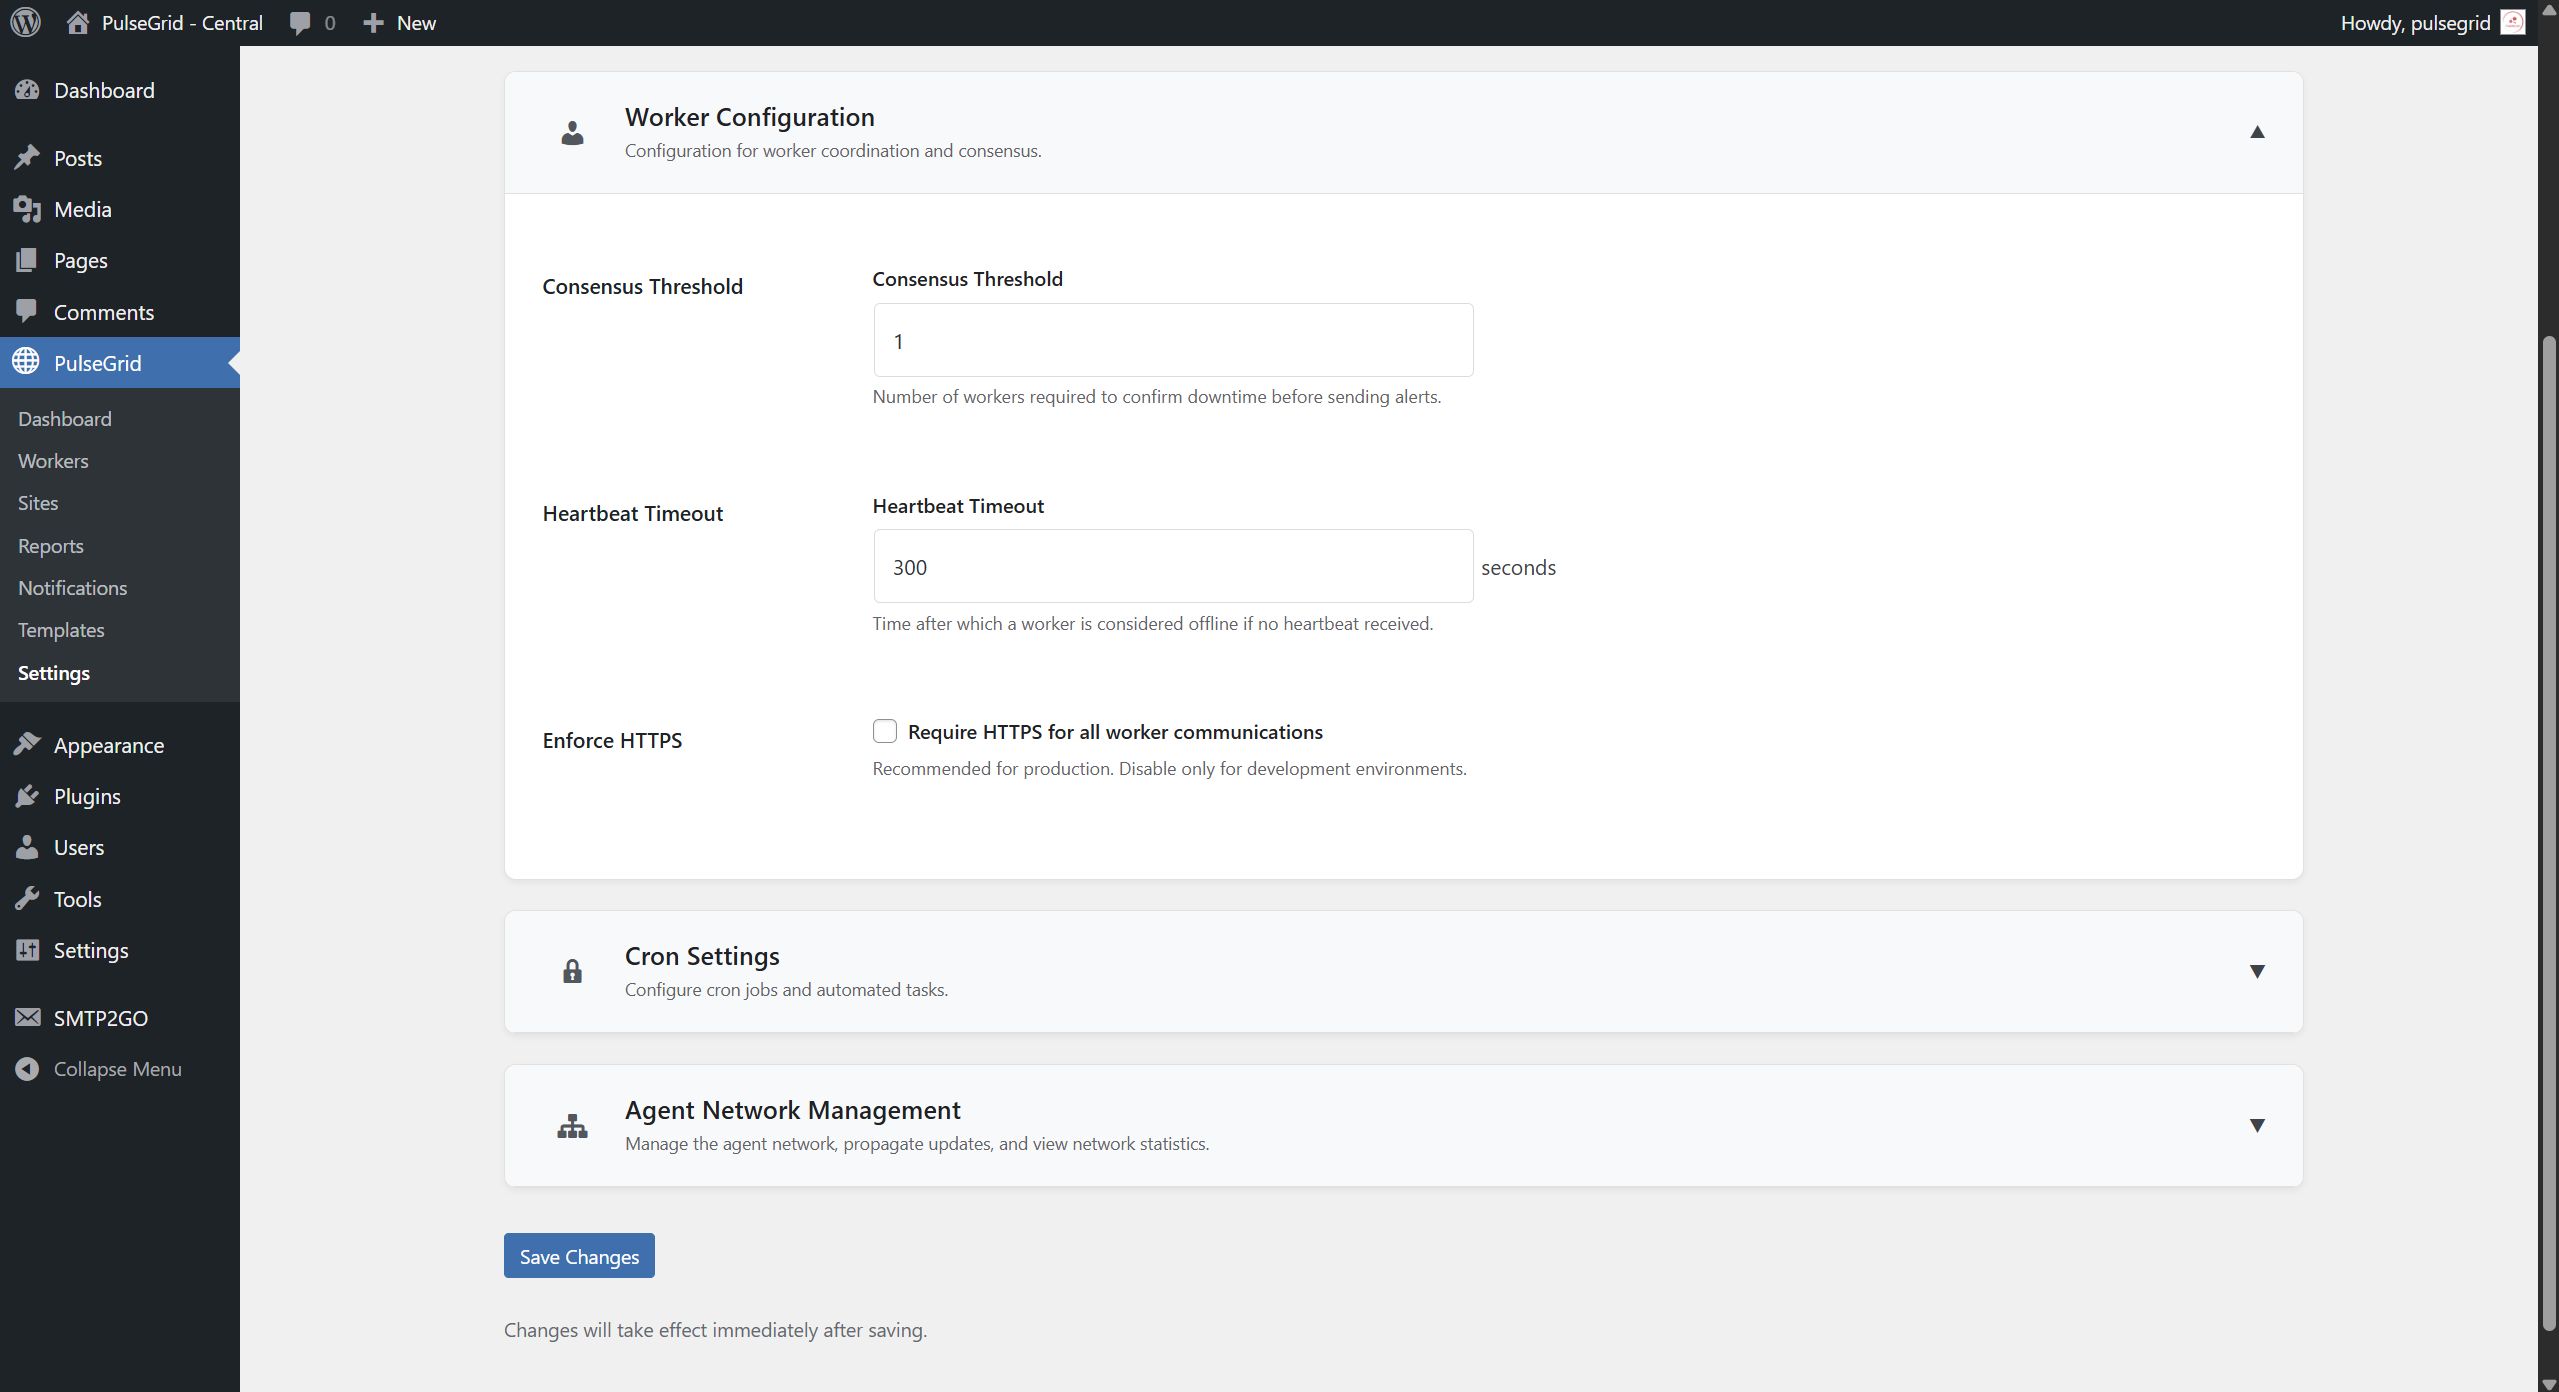
- Consensus Threshold: Number of agents required to confirm downtime (default: 2)
- Default Check Interval: How often sites are monitored in seconds (default: 300)
- Click Save Settings
Security Settings
- HTTPS Enforcement: Enable if all agents use HTTPS (recommended for production)
C) PulseGrid Agent Setup
Configure monitoring worker agents that will perform website checks.
Step 1: Agent Registration - Manual
- After activating PulseGrid Agent, go to PulseGrid Agent -> Settings
- Enter the following information:
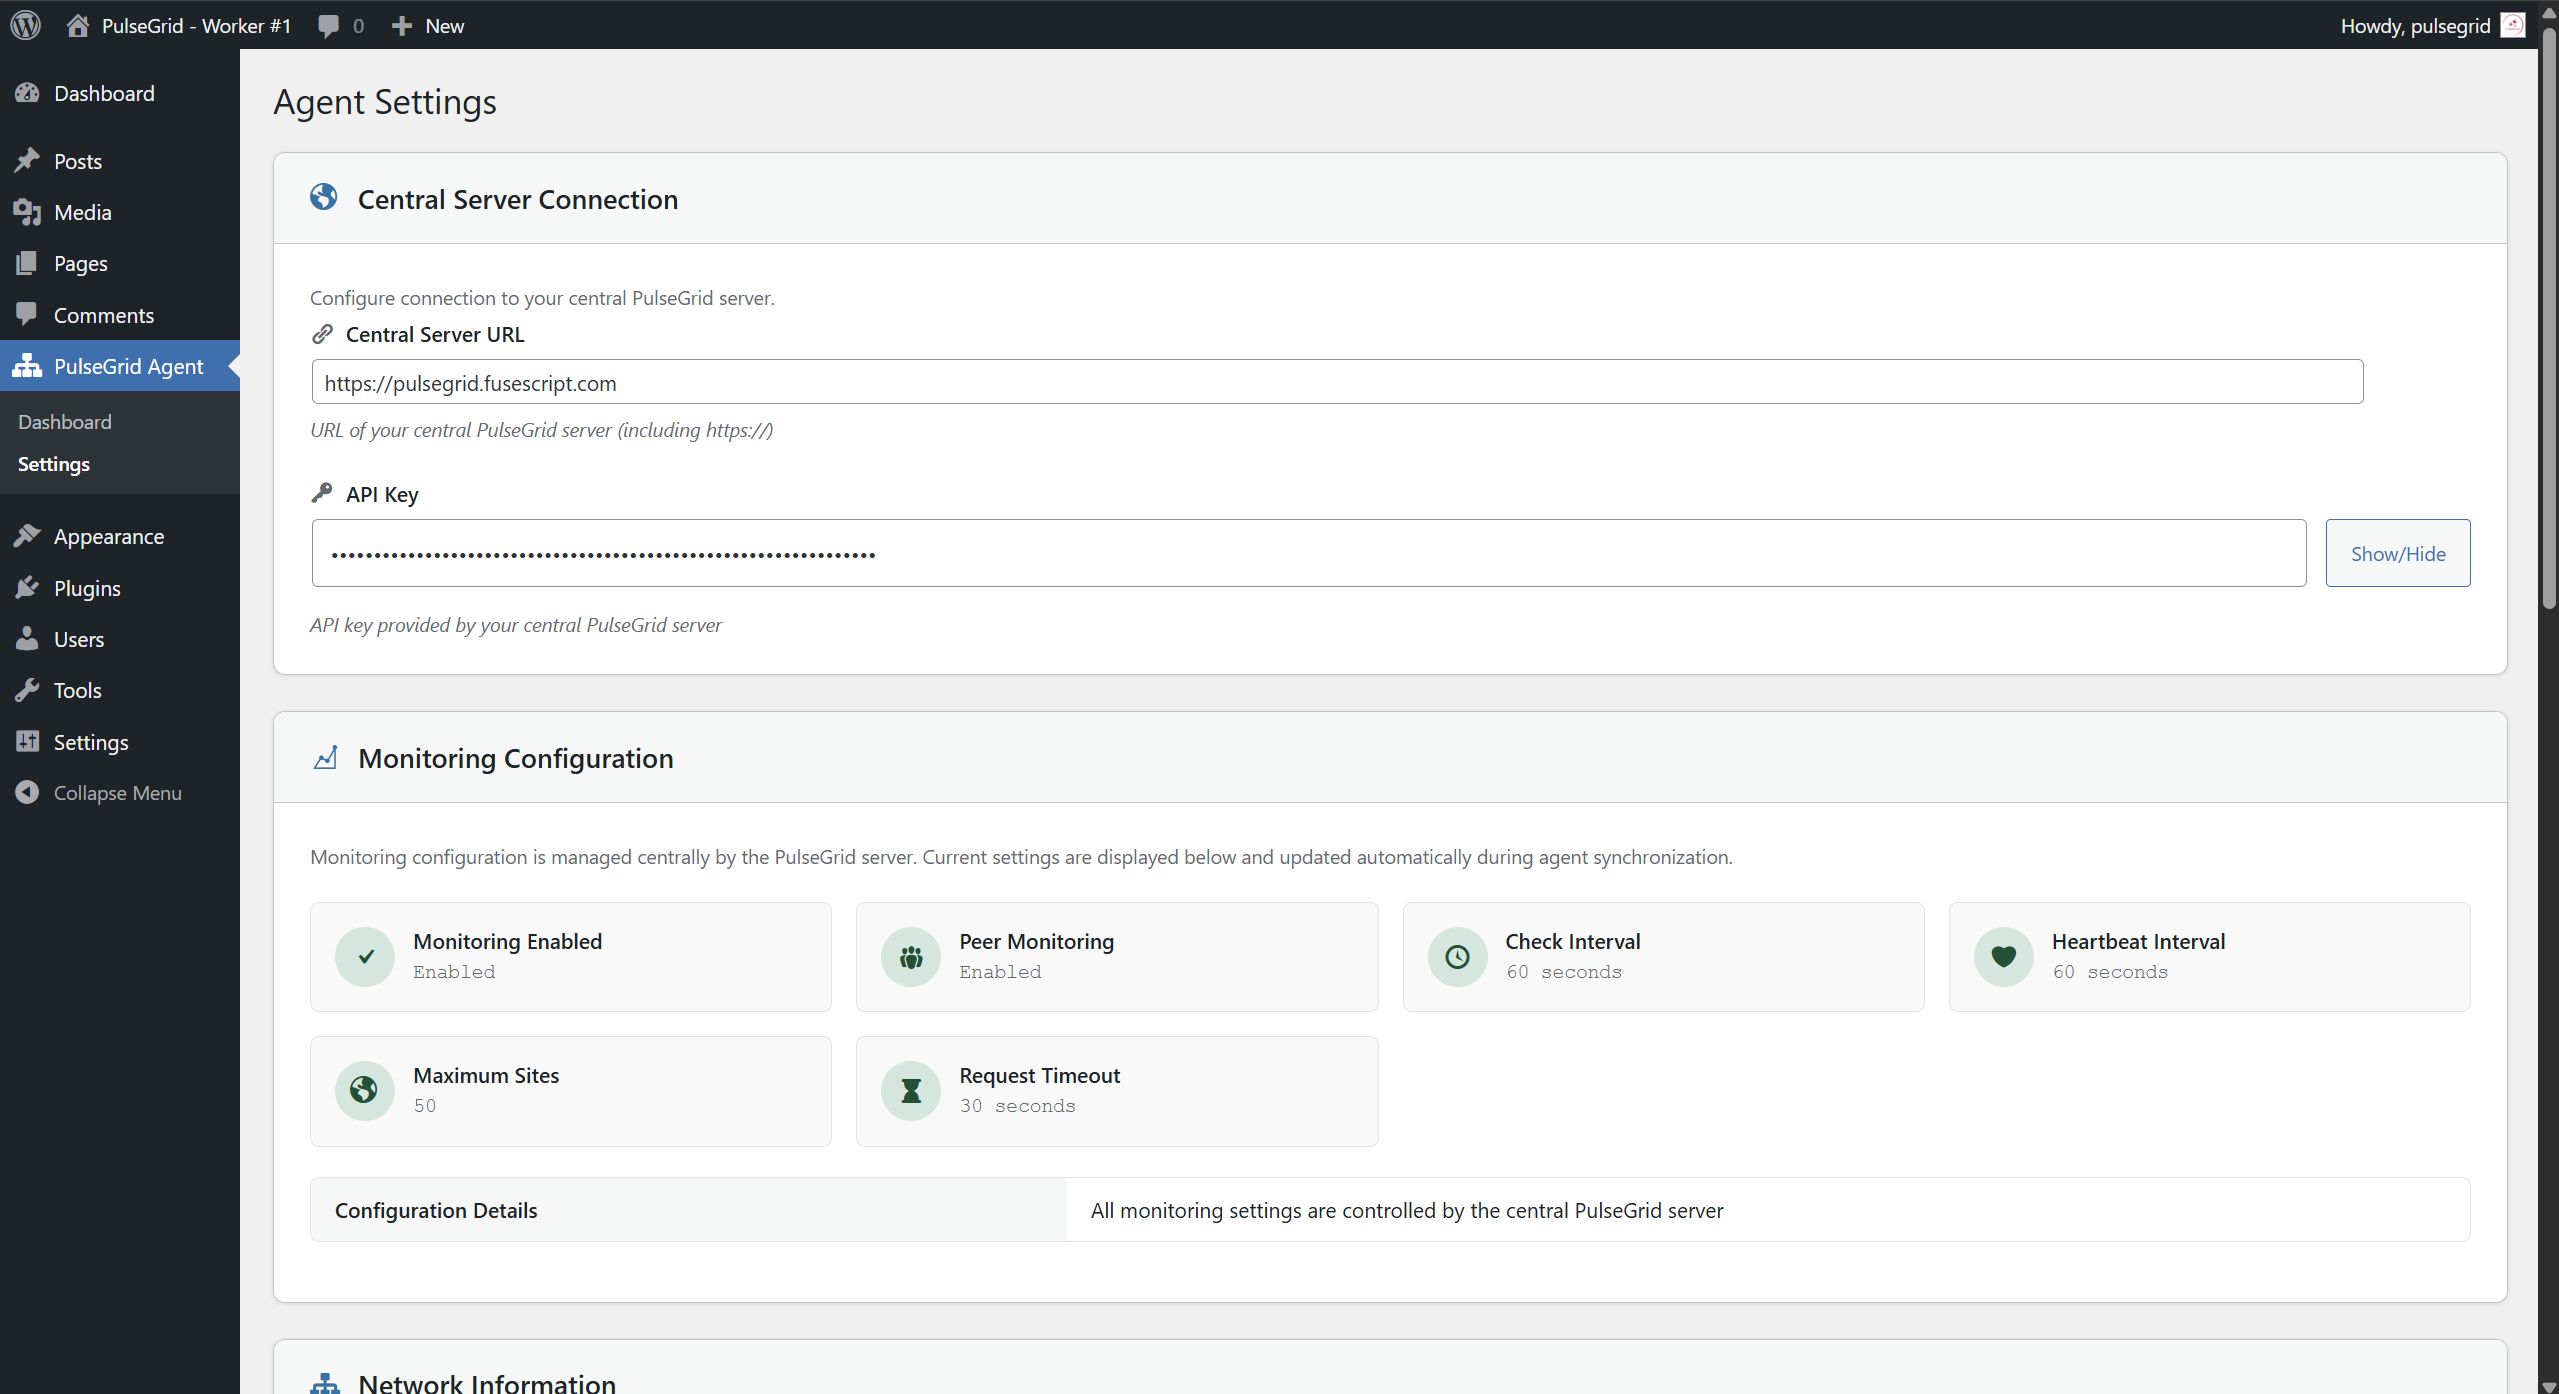
- Central Server URL: Full URL to your PulseGrid Central installation (e.g., https://central.example.com)
- API Key: Copy this from PulseGrid Central -> Settings
- Save
-
- Go to Dashboard
- Click Test Central Connection to verify connectivity
- Click Register Agent to complete registration
Step 2: Monitoring Configuration - For this, go back to the site where you installed PulseGrid
- Edit the Worker and update the following settings:
- Enable Monitoring: Turn on website monitoring for this agent
- Enable Peer Monitoring: Allow this agent to participate in downtime verification
- Check Interval: How often this agent checks assigned sites (seconds)
- Heartbeat Interval: How often the agent reports to the central server (seconds)
- Max Sites: Maximum number of sites this agent can monitor
- Timeout: Request timeout for website checks (seconds)
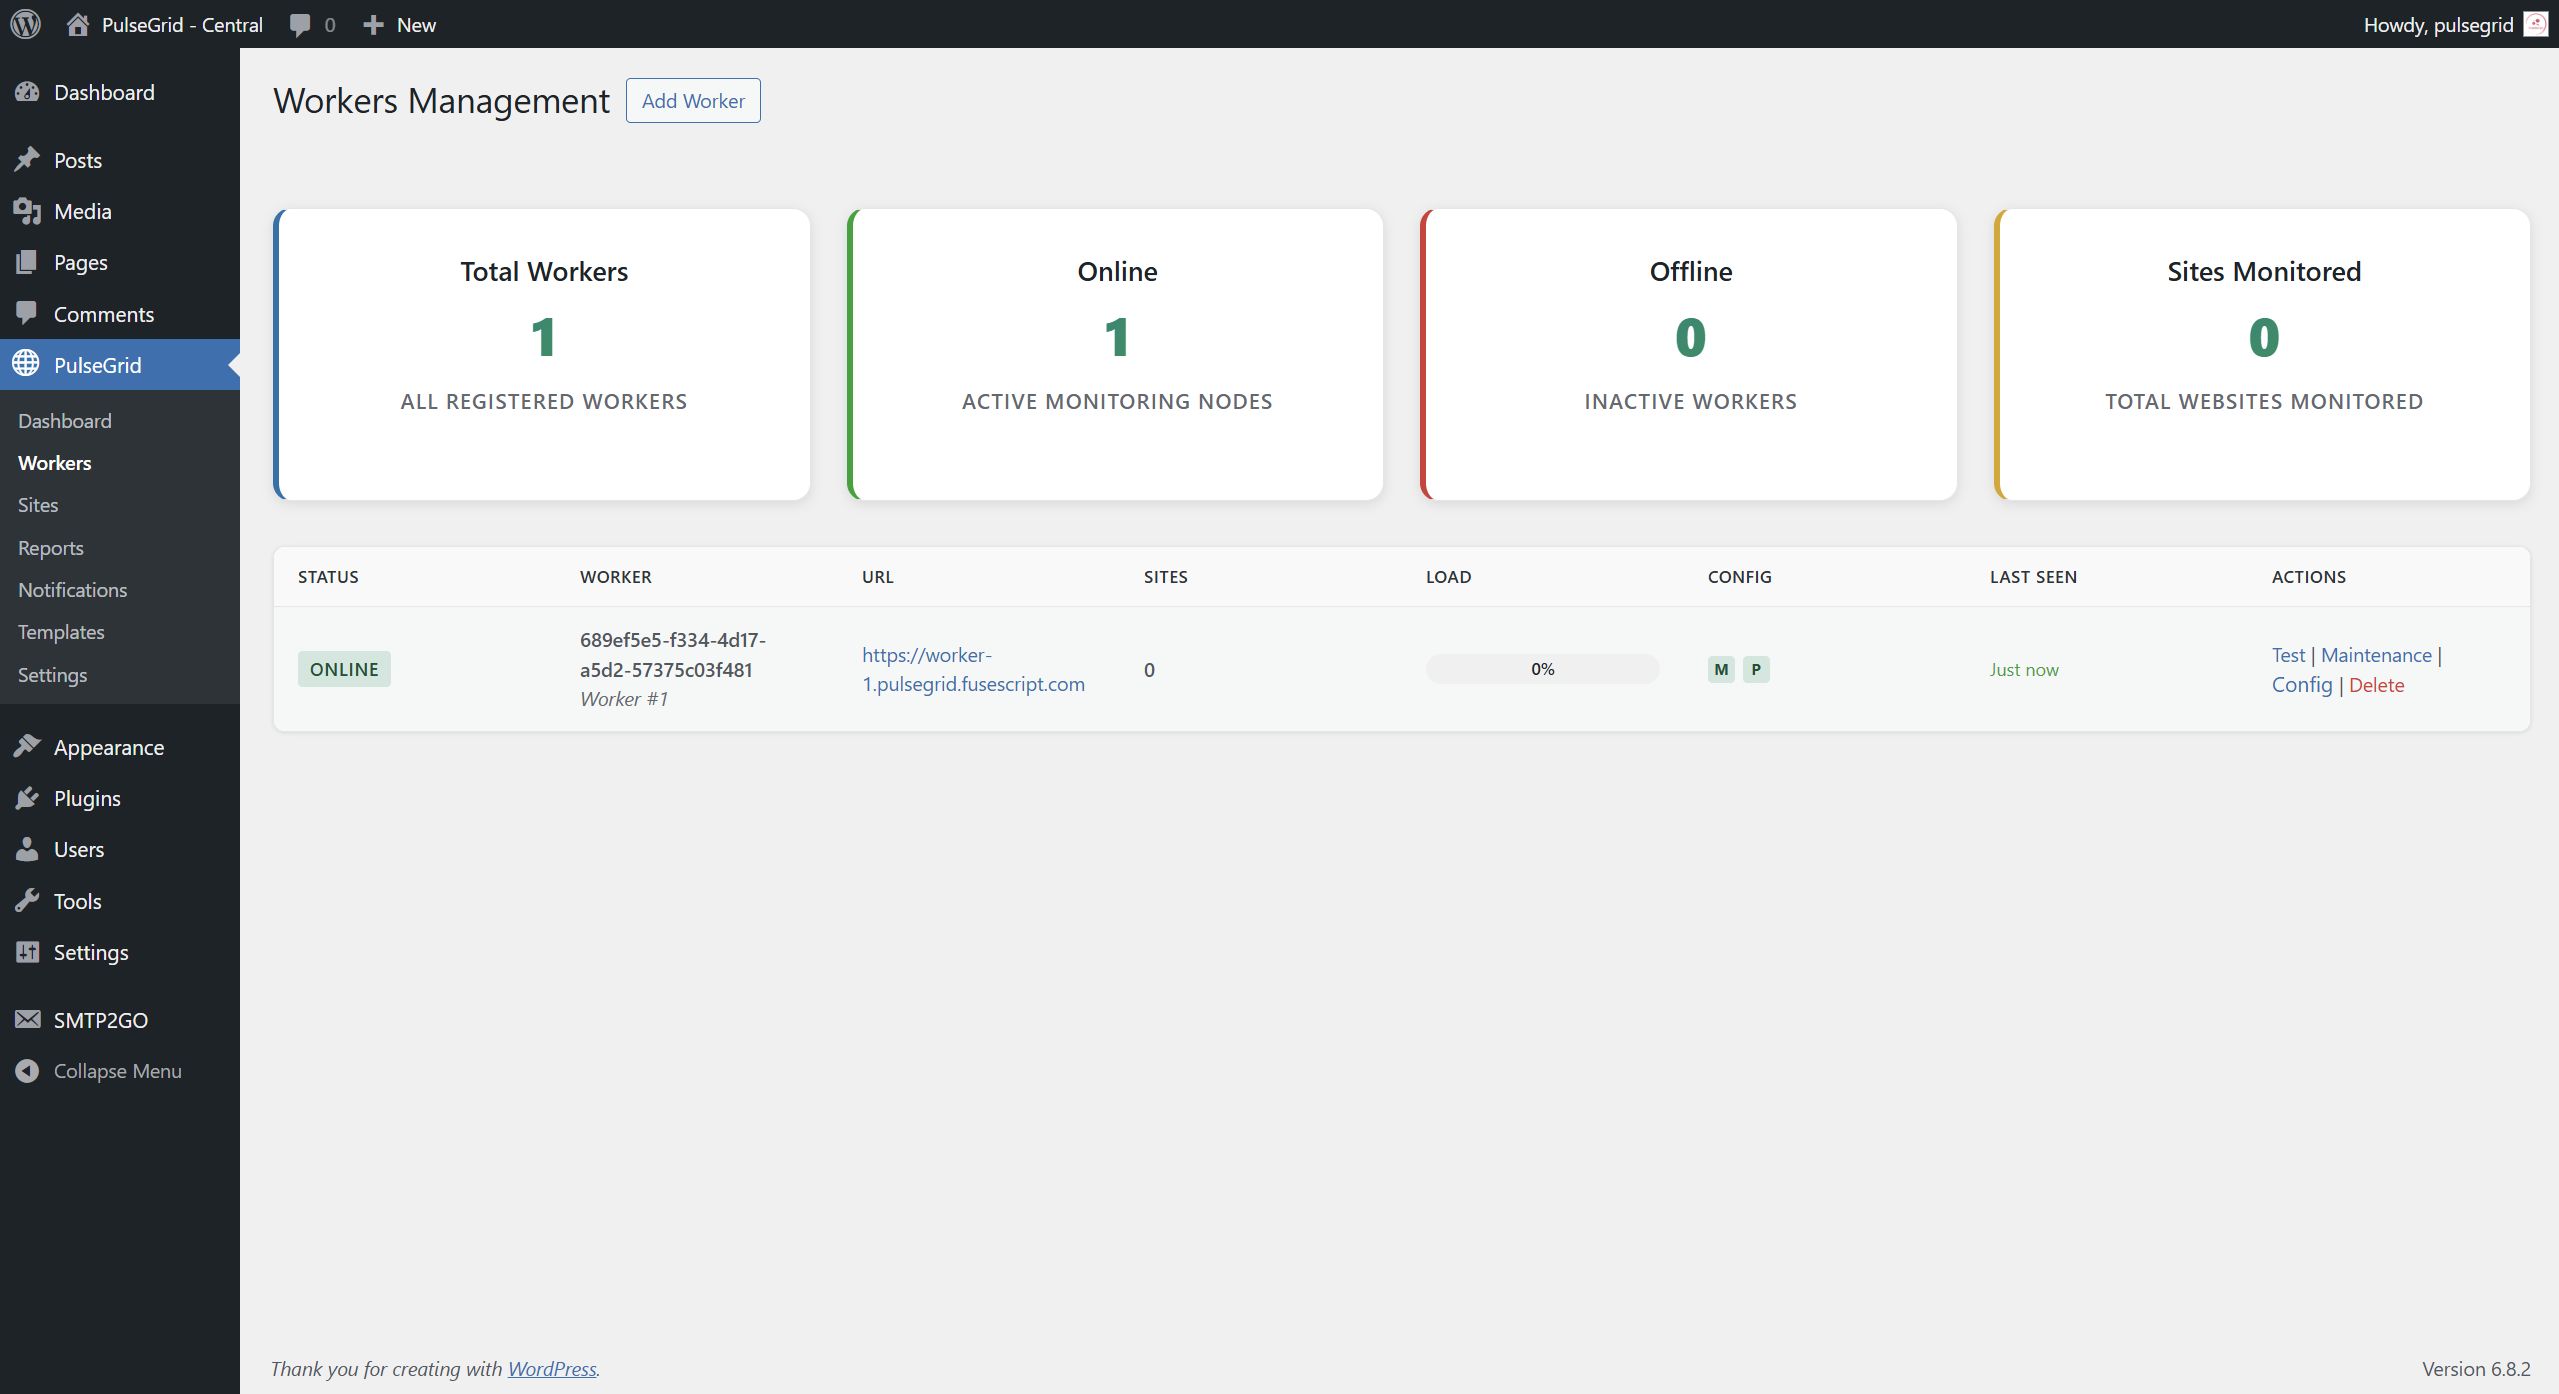
D) Workers Management
Manage your monitoring agents from the central dashboard.
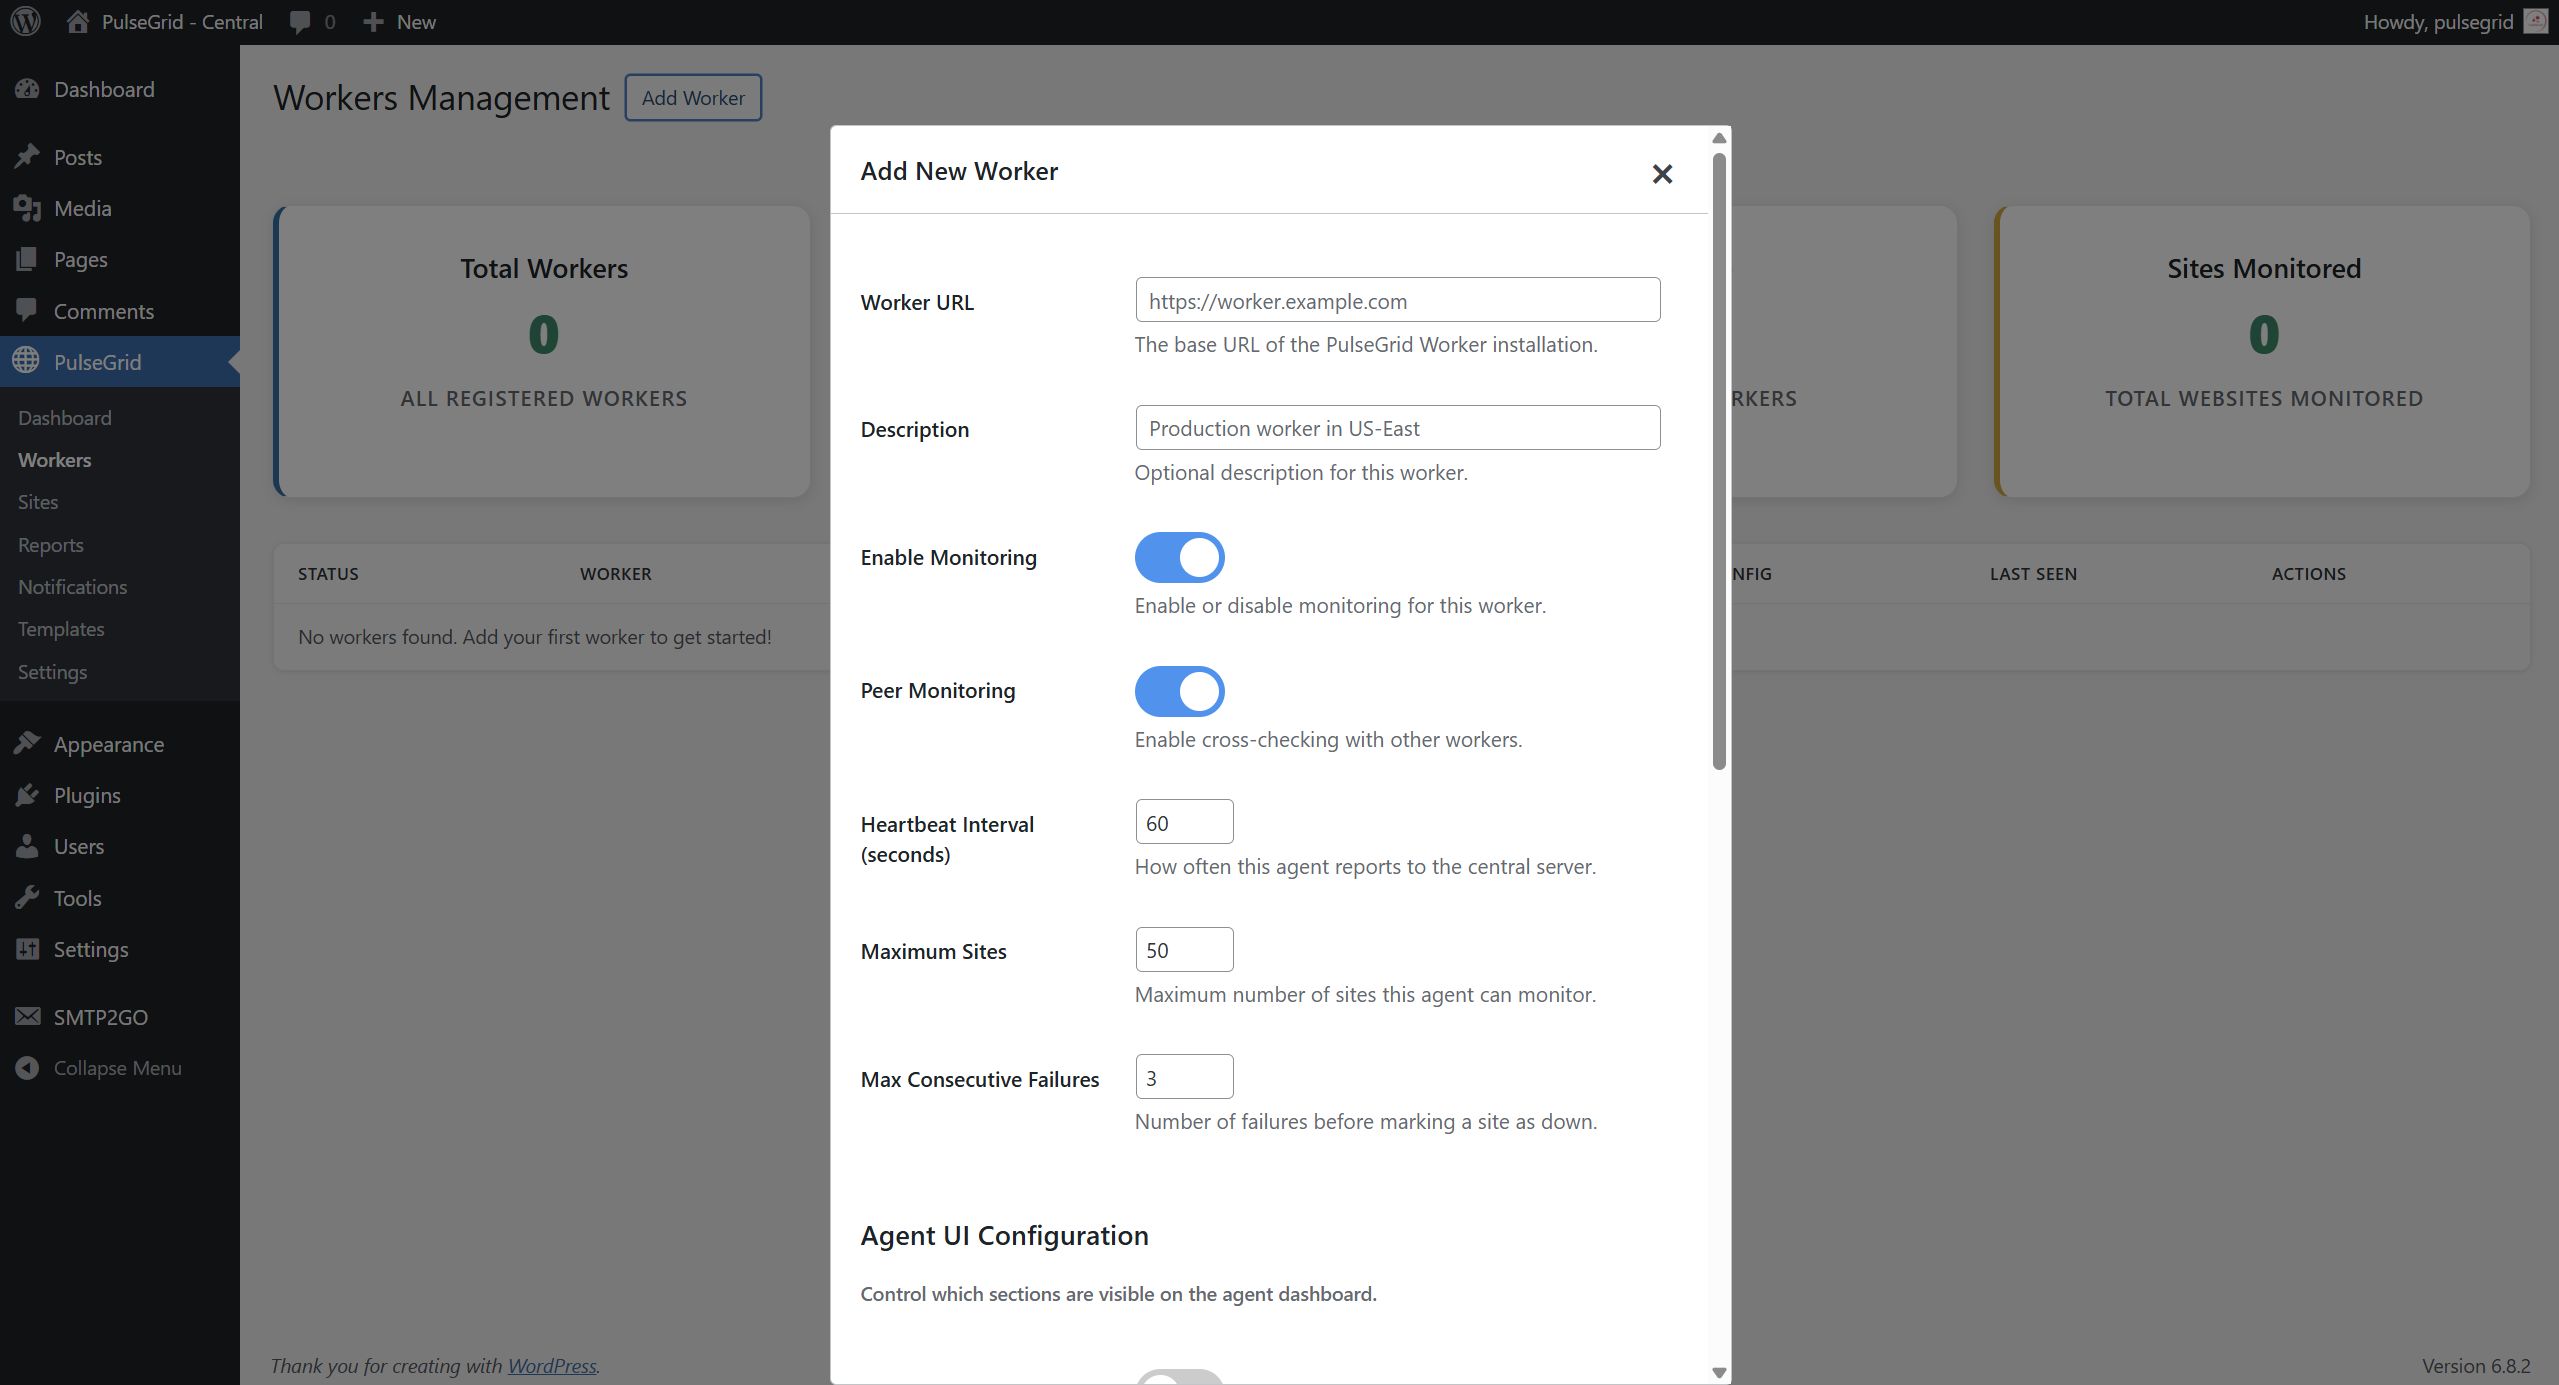
Adding Workers
- Go to PulseGrid -> Workers in the central installation
- Click Add Worker
- Fill in the worker details:
- Worker URL: Full URL to the agent's WordPress site
- Description: Descriptive name for the agent
- Change any other settings and/or disable UI widgets for the worker side
- Click Add Worker
Worker Status Monitoring
- Online: Worker is active and responding to heartbeats
- Offline: Worker has missed heartbeat checks
- Maintenance: Worker is temporarily disabled
- Error: Worker reported errors in the last communication
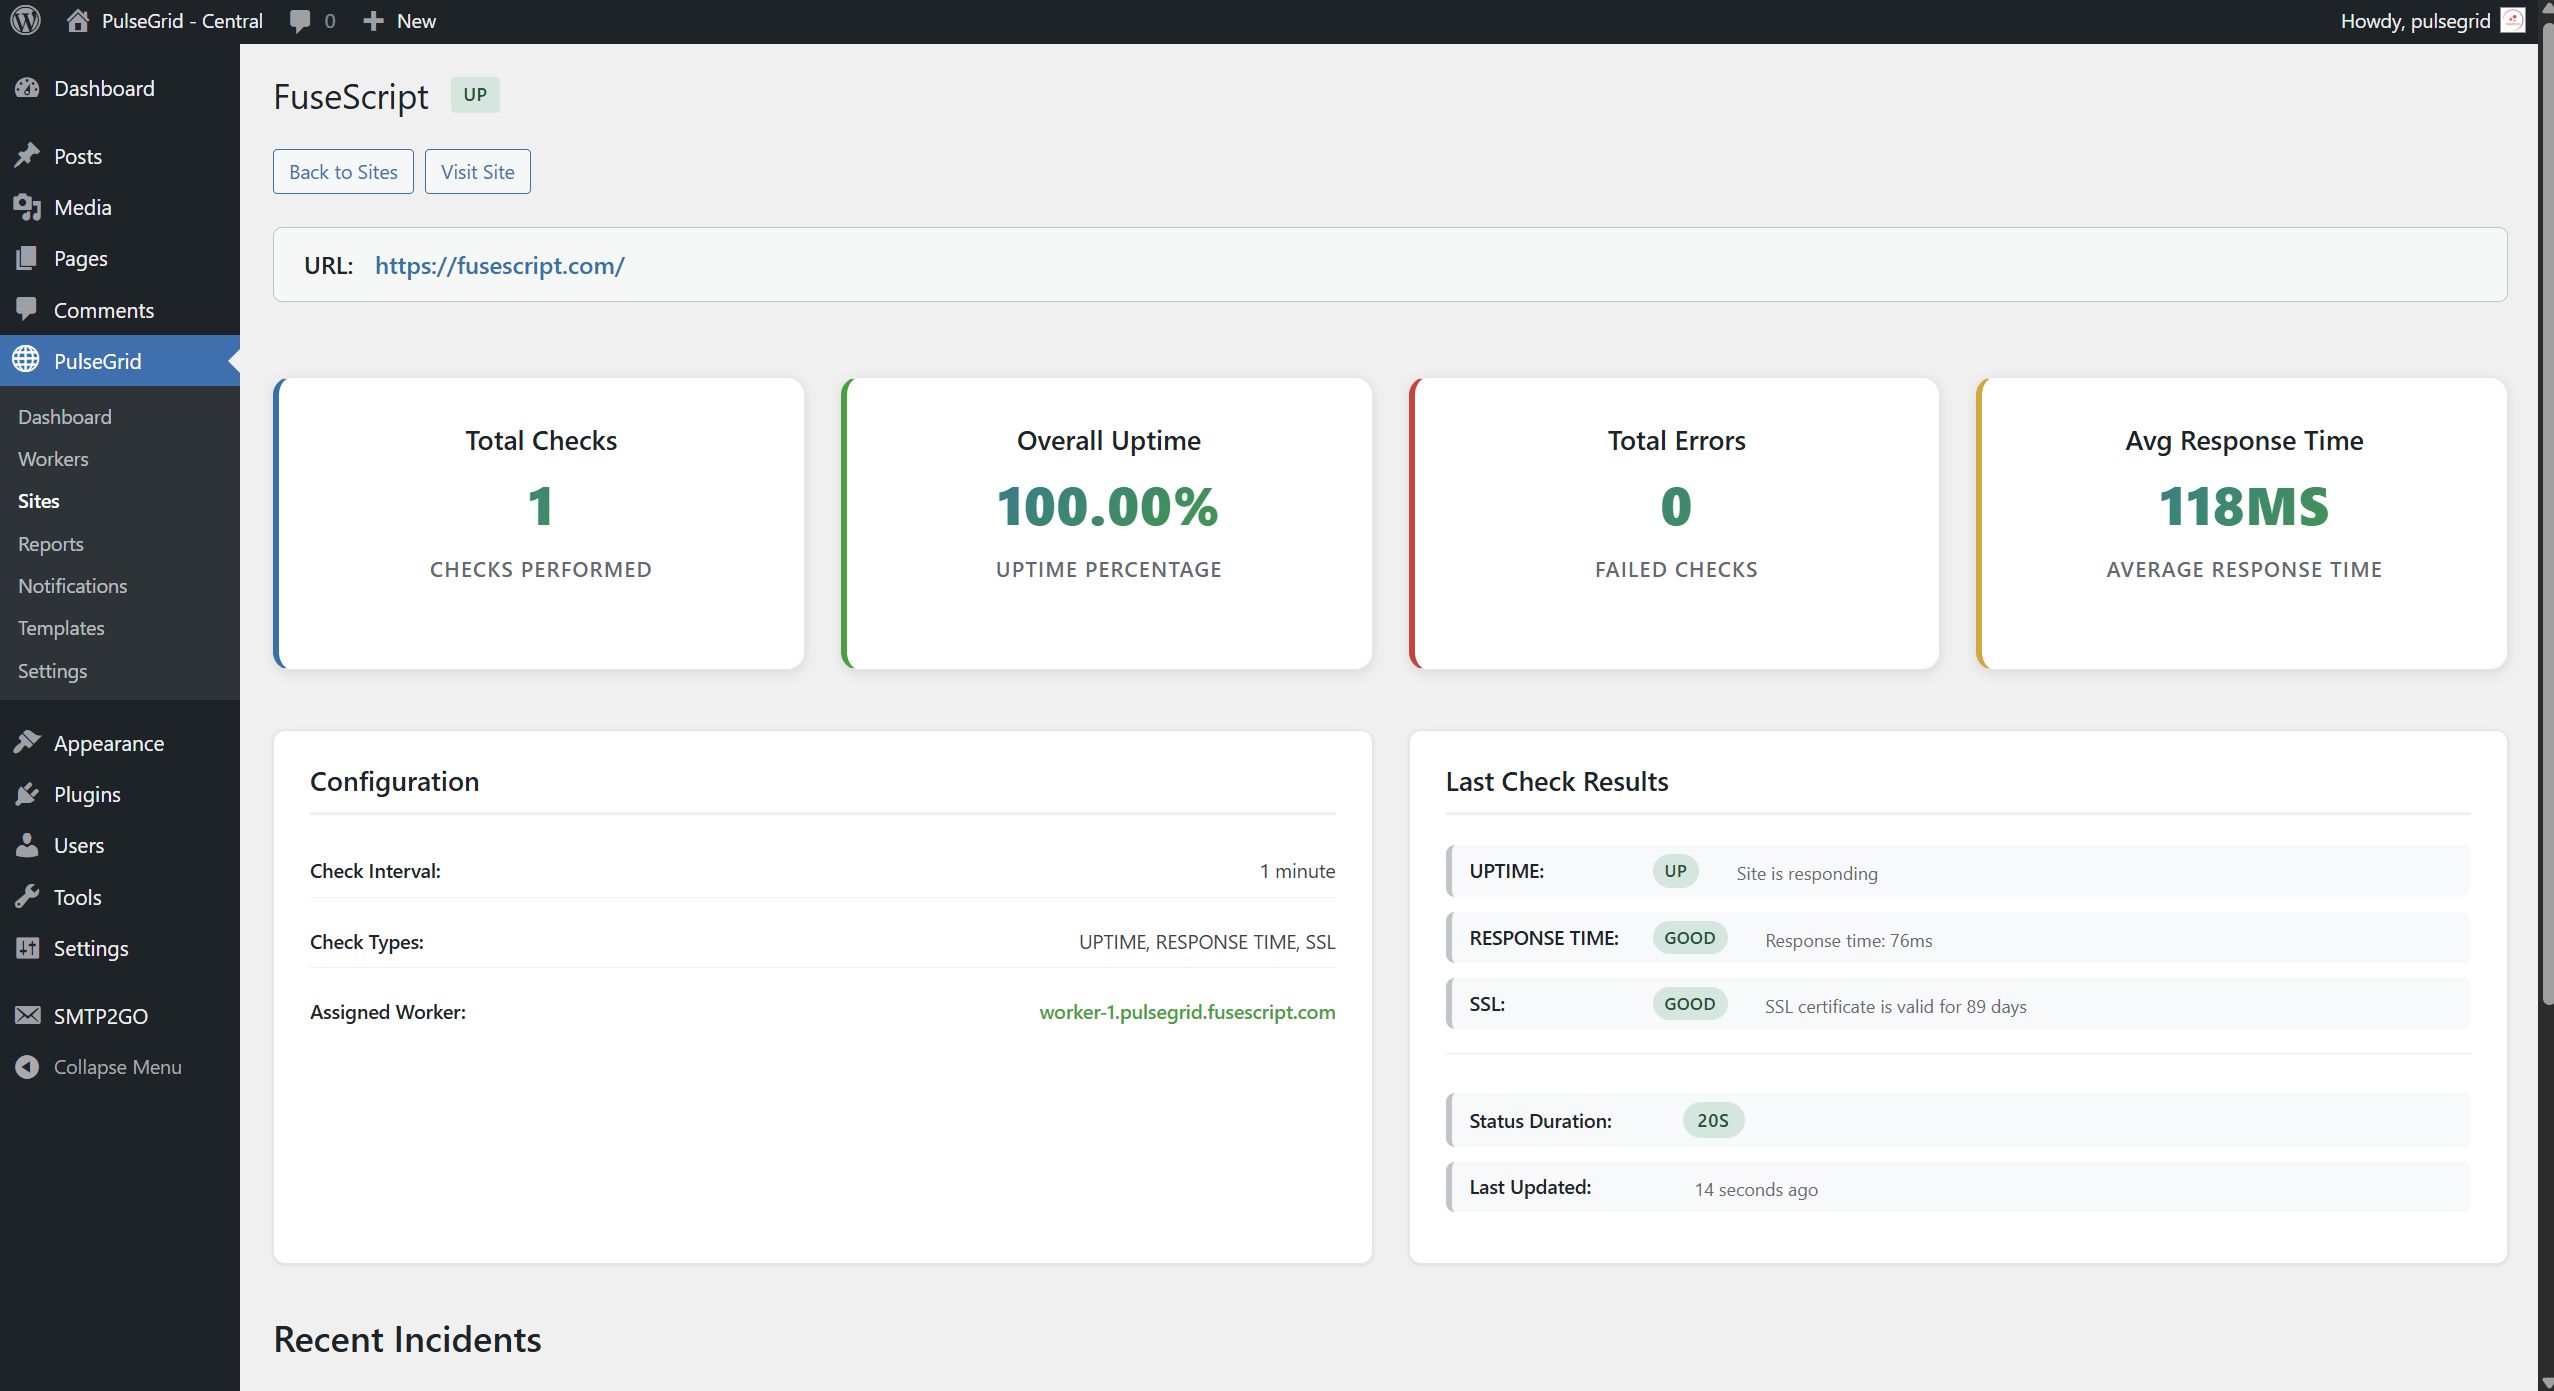
E) Sites Management
Add and configure websites to monitor.
Adding Sites
- Go to PulseGrid -> Sites
- Click Add New Site
- Configure the following:
- Site URL: Full URL to monitor (including https://)
- Site Name: Descriptive name for the website
- Check Interval: Override default monitoring frequency for this site
- Notification Emails: Specific email address for this site's alerts (optional)
- Assigned Worker: Select a worker to handle this site (optional)
- Check Types: Select monitoring types:
- HTTP Status: Check for proper HTTP response codes
- Response Time: Check for proper HTTP response times
- SSL Certificate: Monitor SSL certificate validity and expiration
-
Content Check: Verify specific content exists on the page
- Expected Content: Text that should appear on the page (optional)
- Click Save Site
F) Notifications & Templates
Configure alert notifications and customise email templates.
Notification Templates
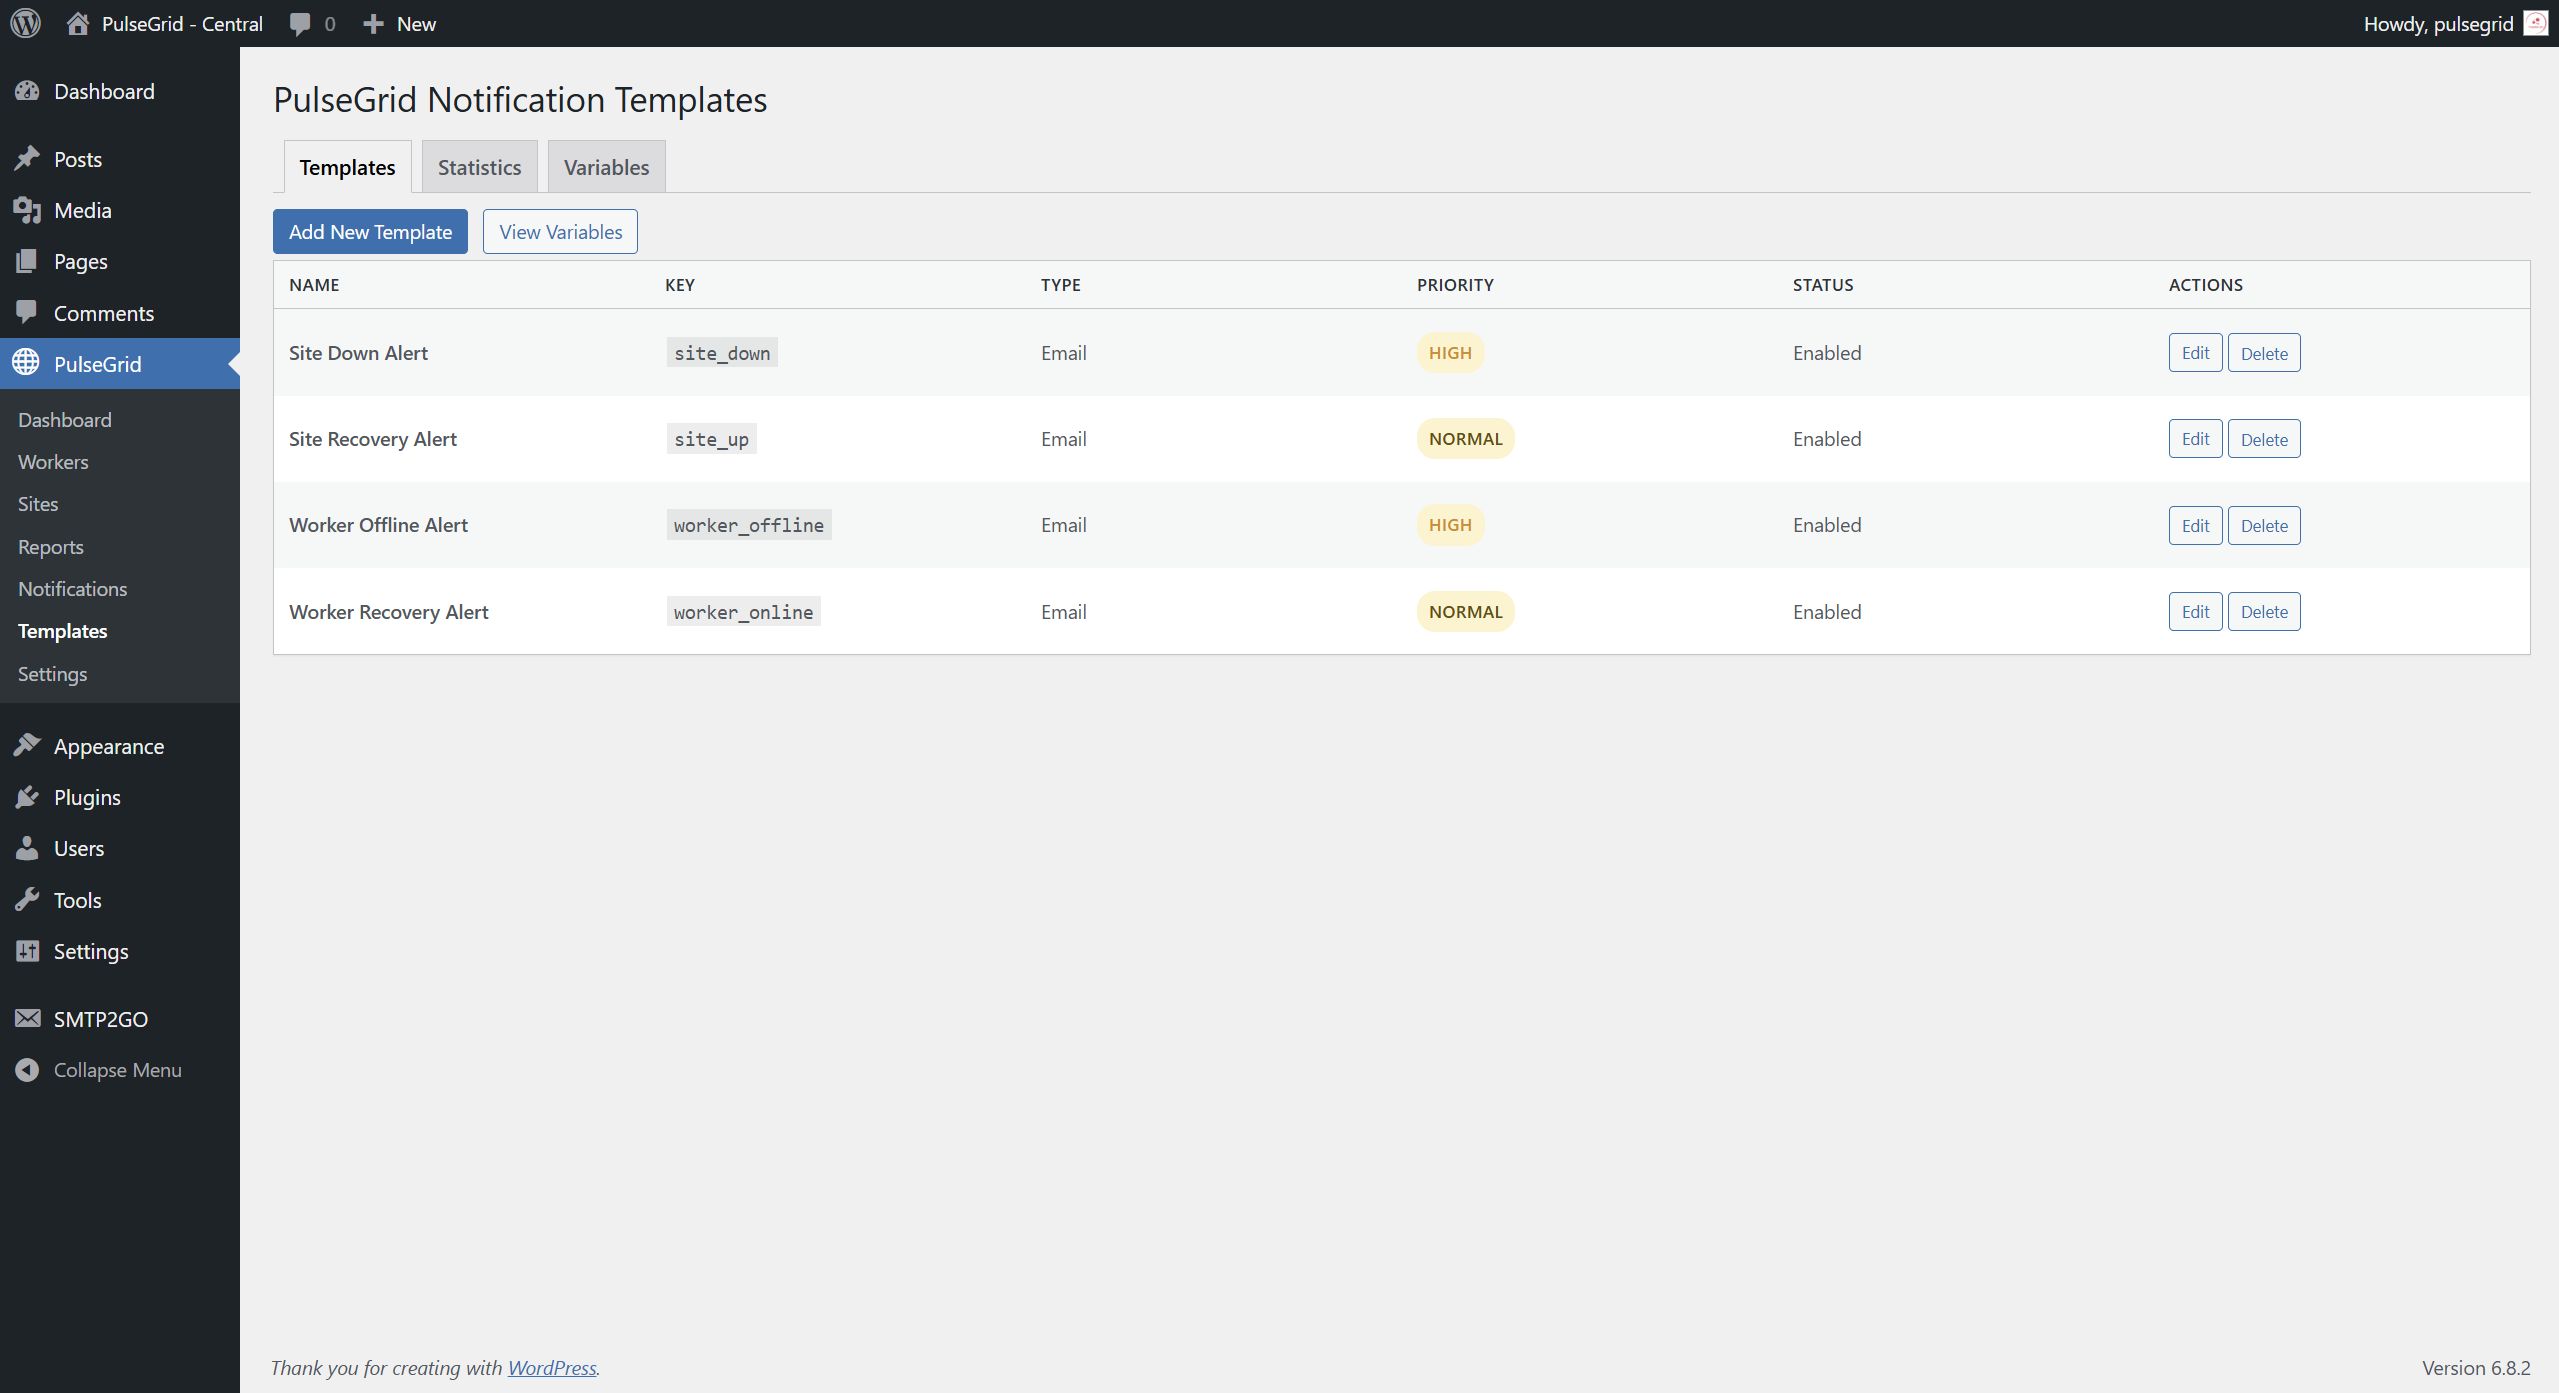
- Go to PulseGrid -> Templates
- Default templates are created automatically:
- Site Down: Sent when a website goes offline
- Site Up: Sent when a website recovers
- Worker Offline: Sent when a monitoring agent goes offline
- Worker Online: Sent when a monitoring agent comes back online
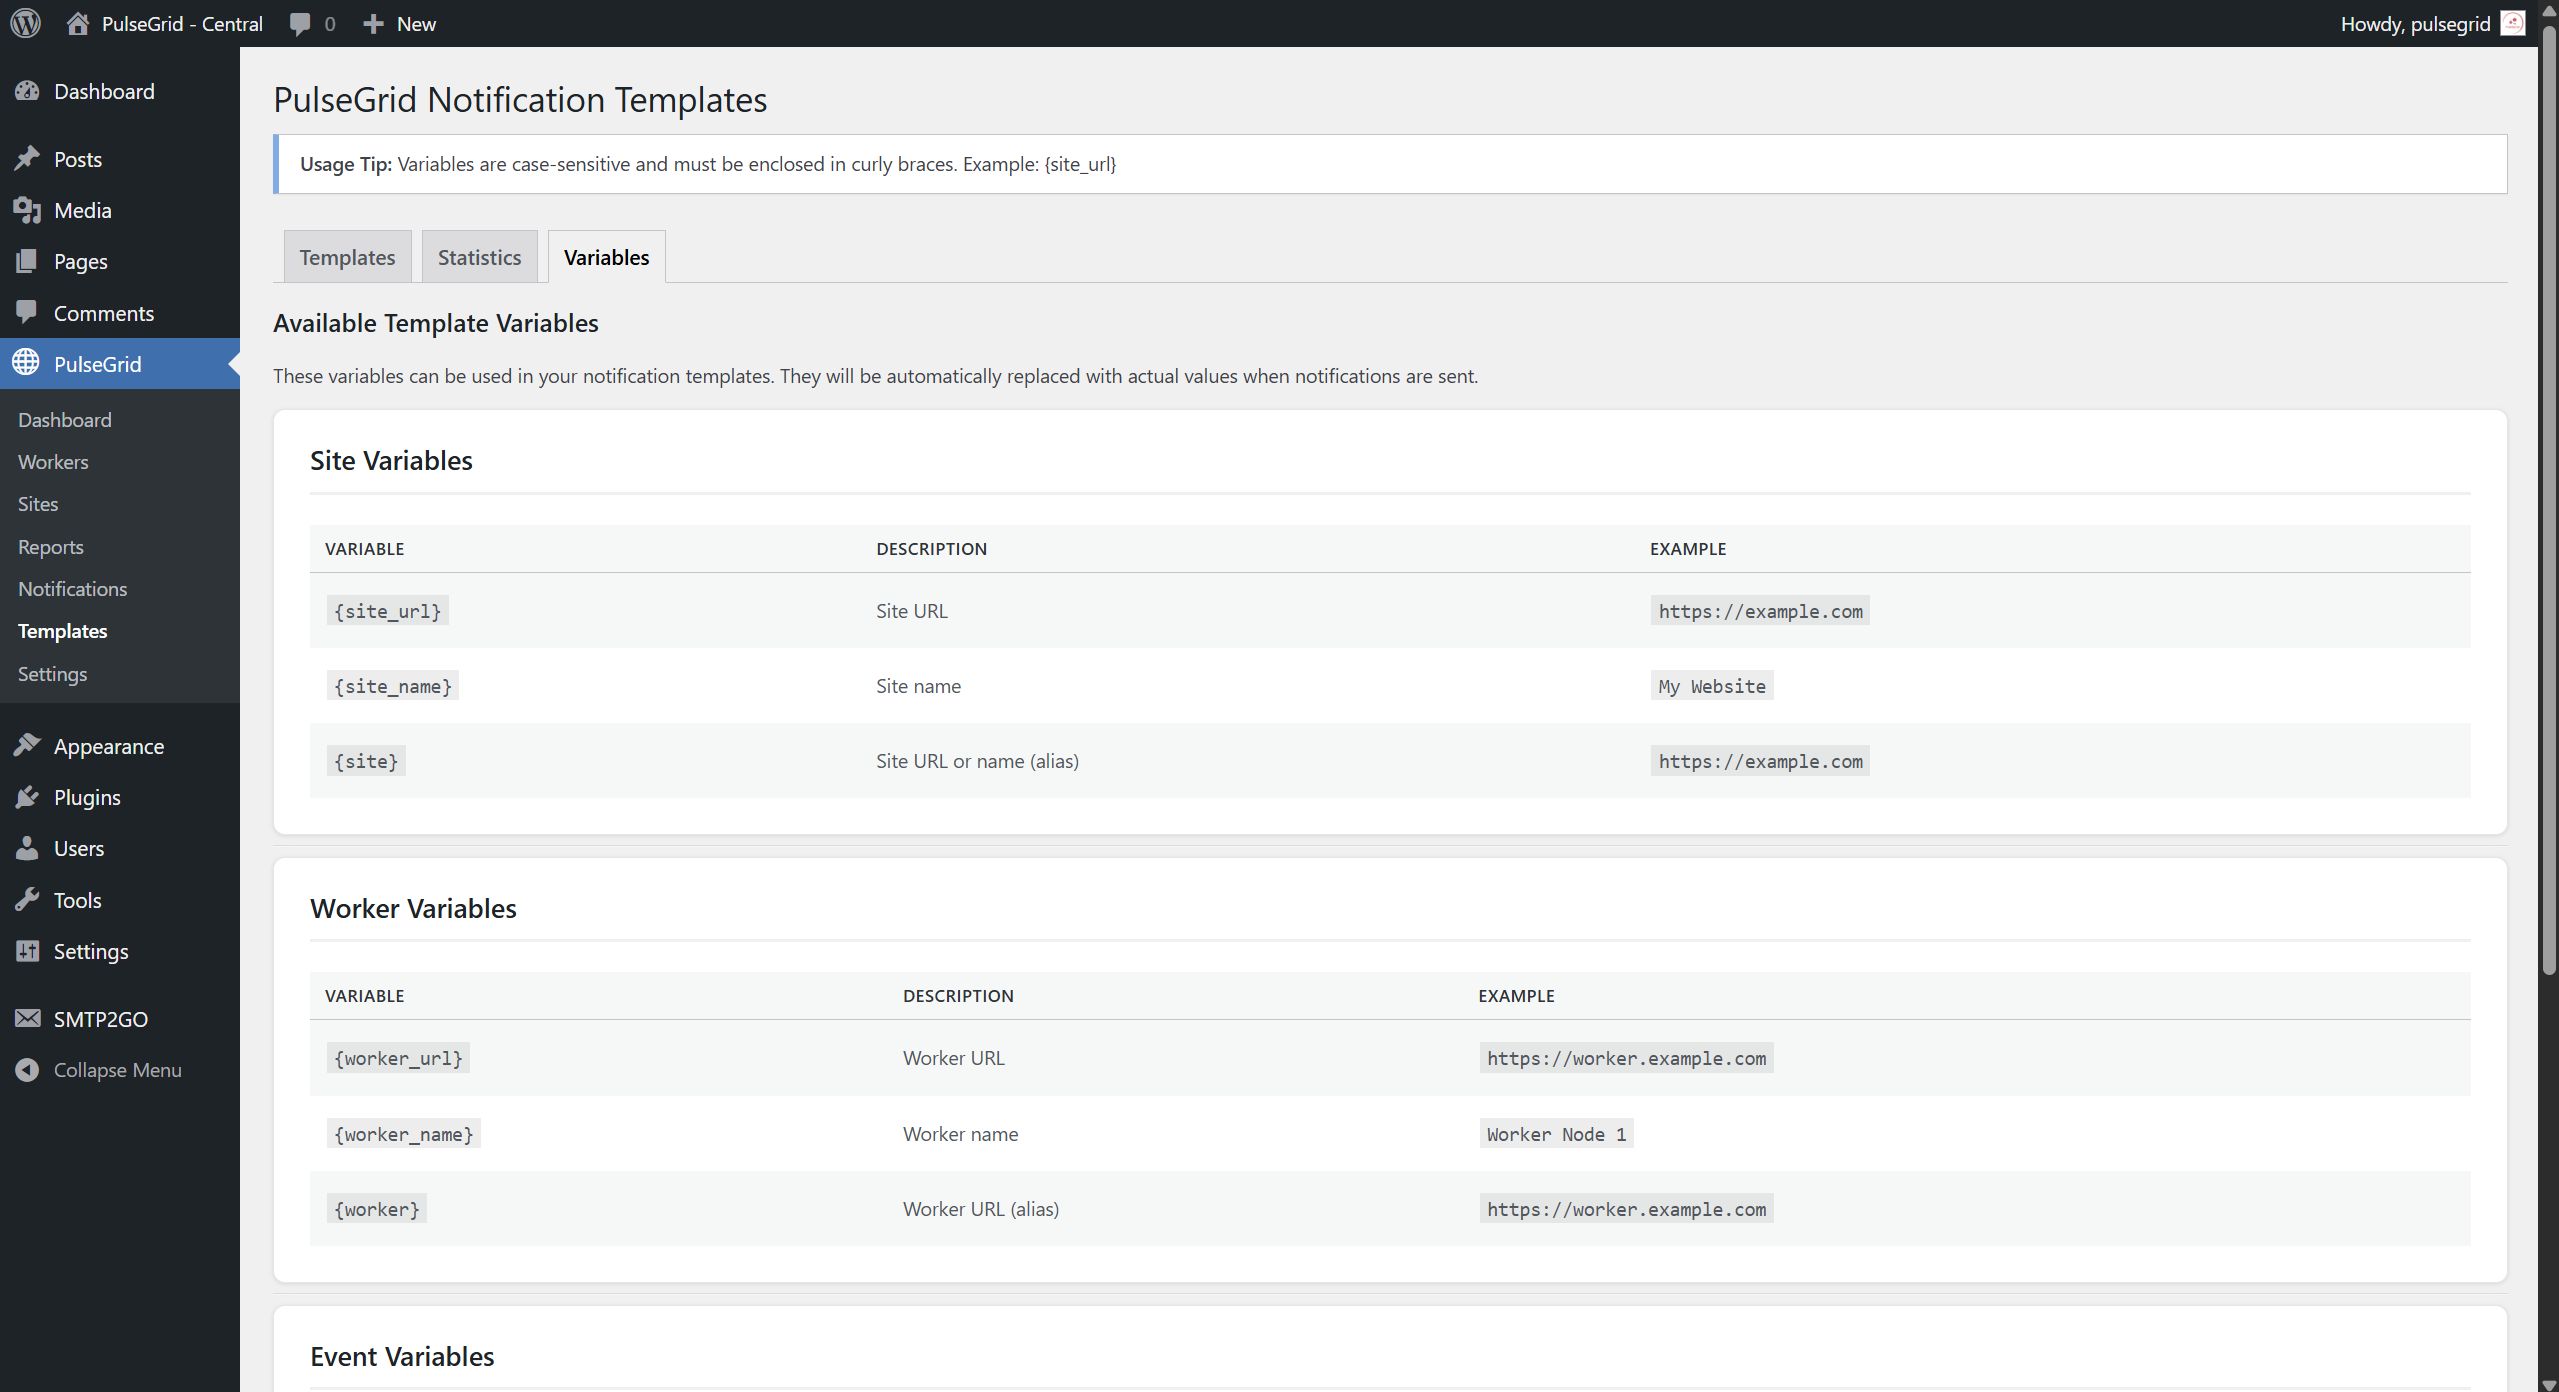
- Click Edit to customise templates with variables:
{{site_url}}- Website URL{{site_name}}- Website name{{worker_name}}- Agent name{{error_type}}- Type of detected error{{timestamp}}- When the event occurred
Managing Notifications
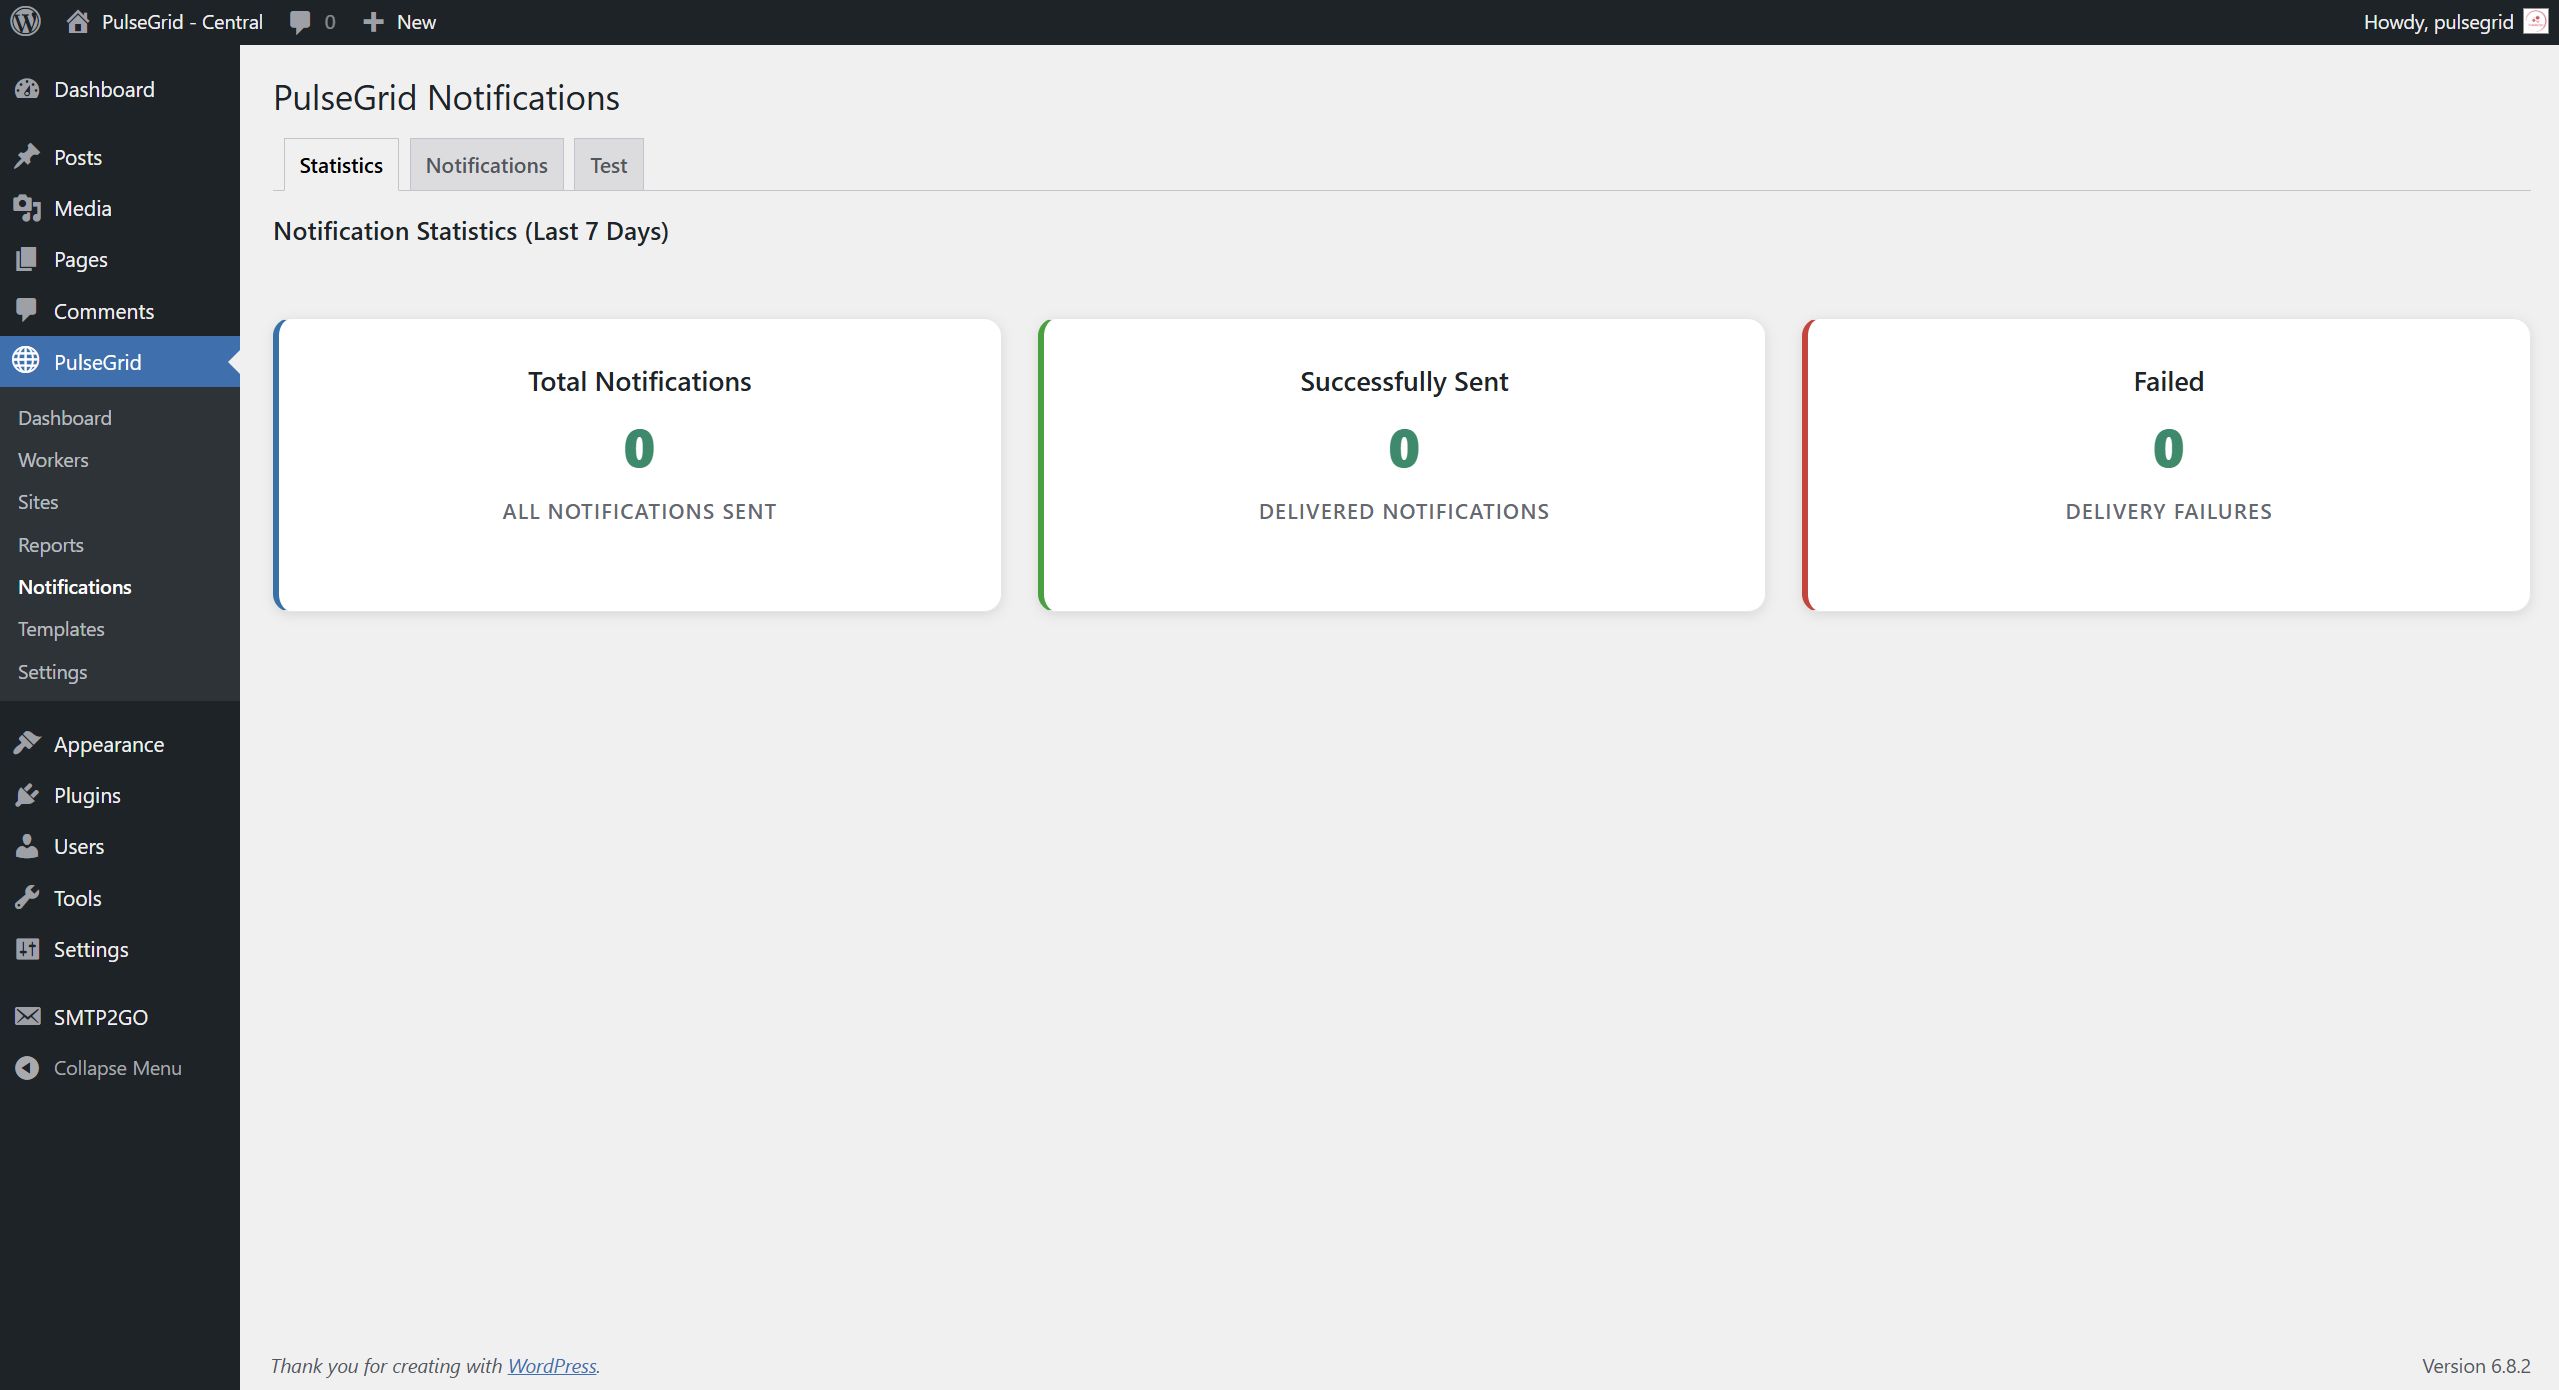
- Go to PulseGrid -> Notifications to view sent notifications
- Filter by status: Pending, Sent, Failed
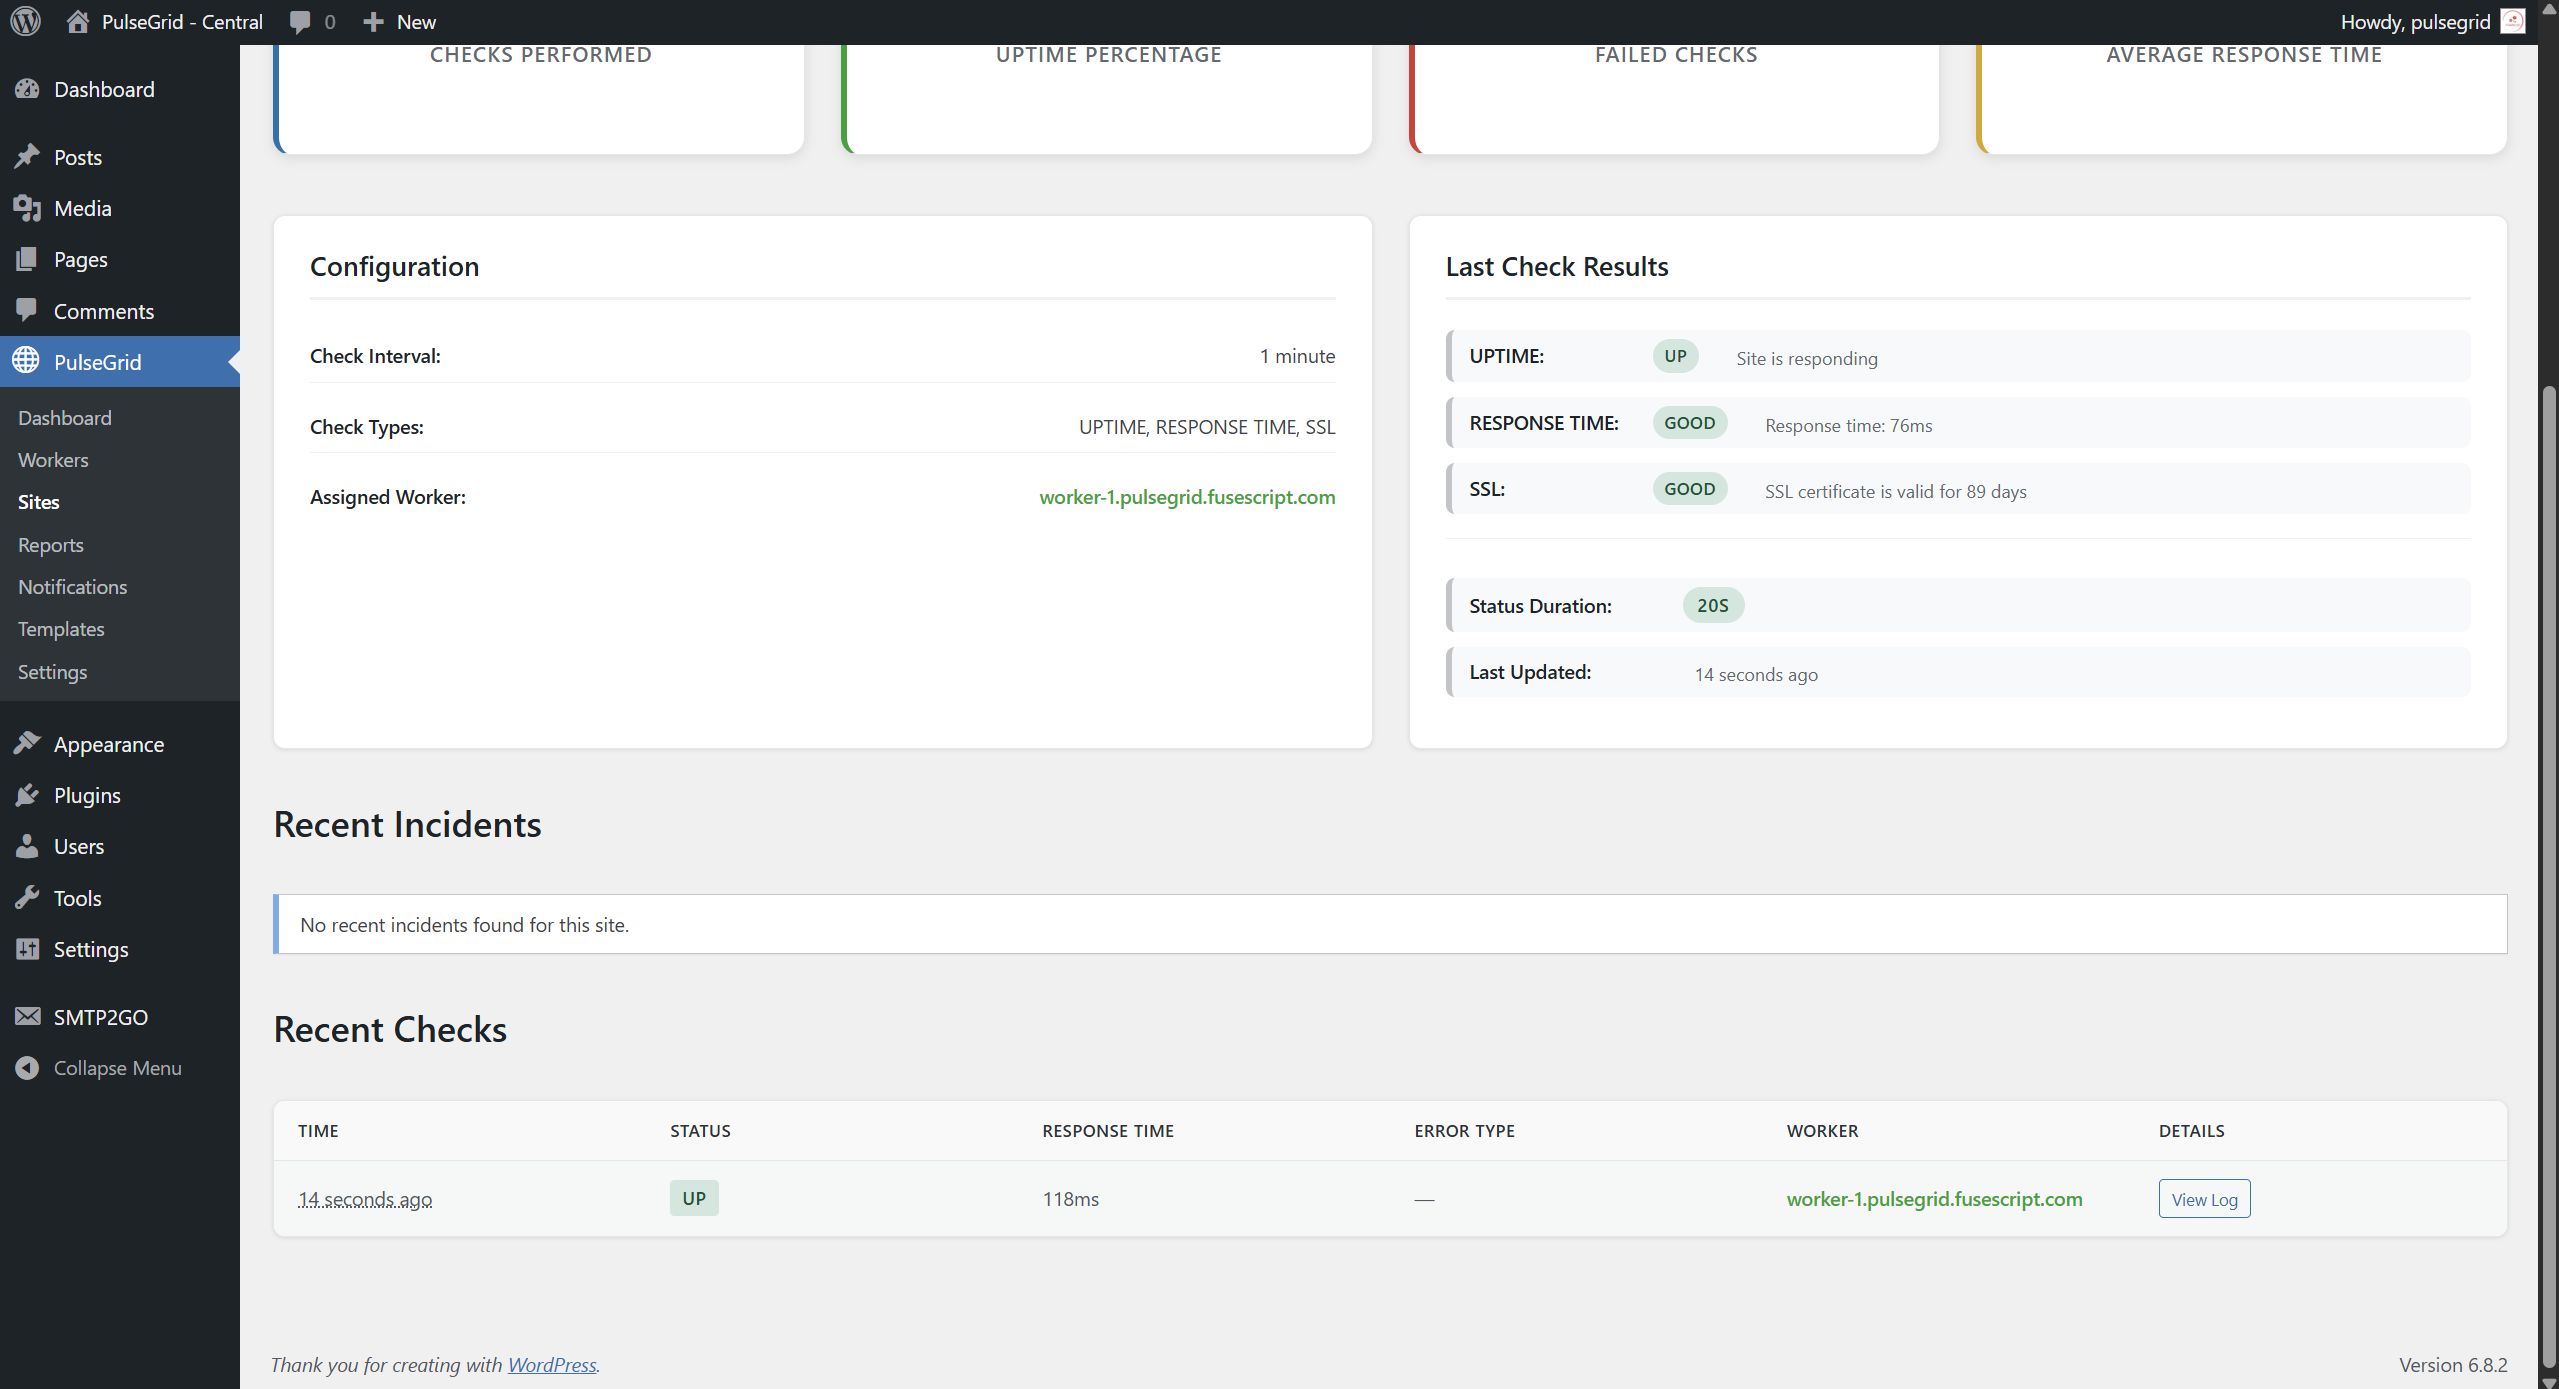
G) Monitoring & Reports
View monitoring results and generate uptime reports.
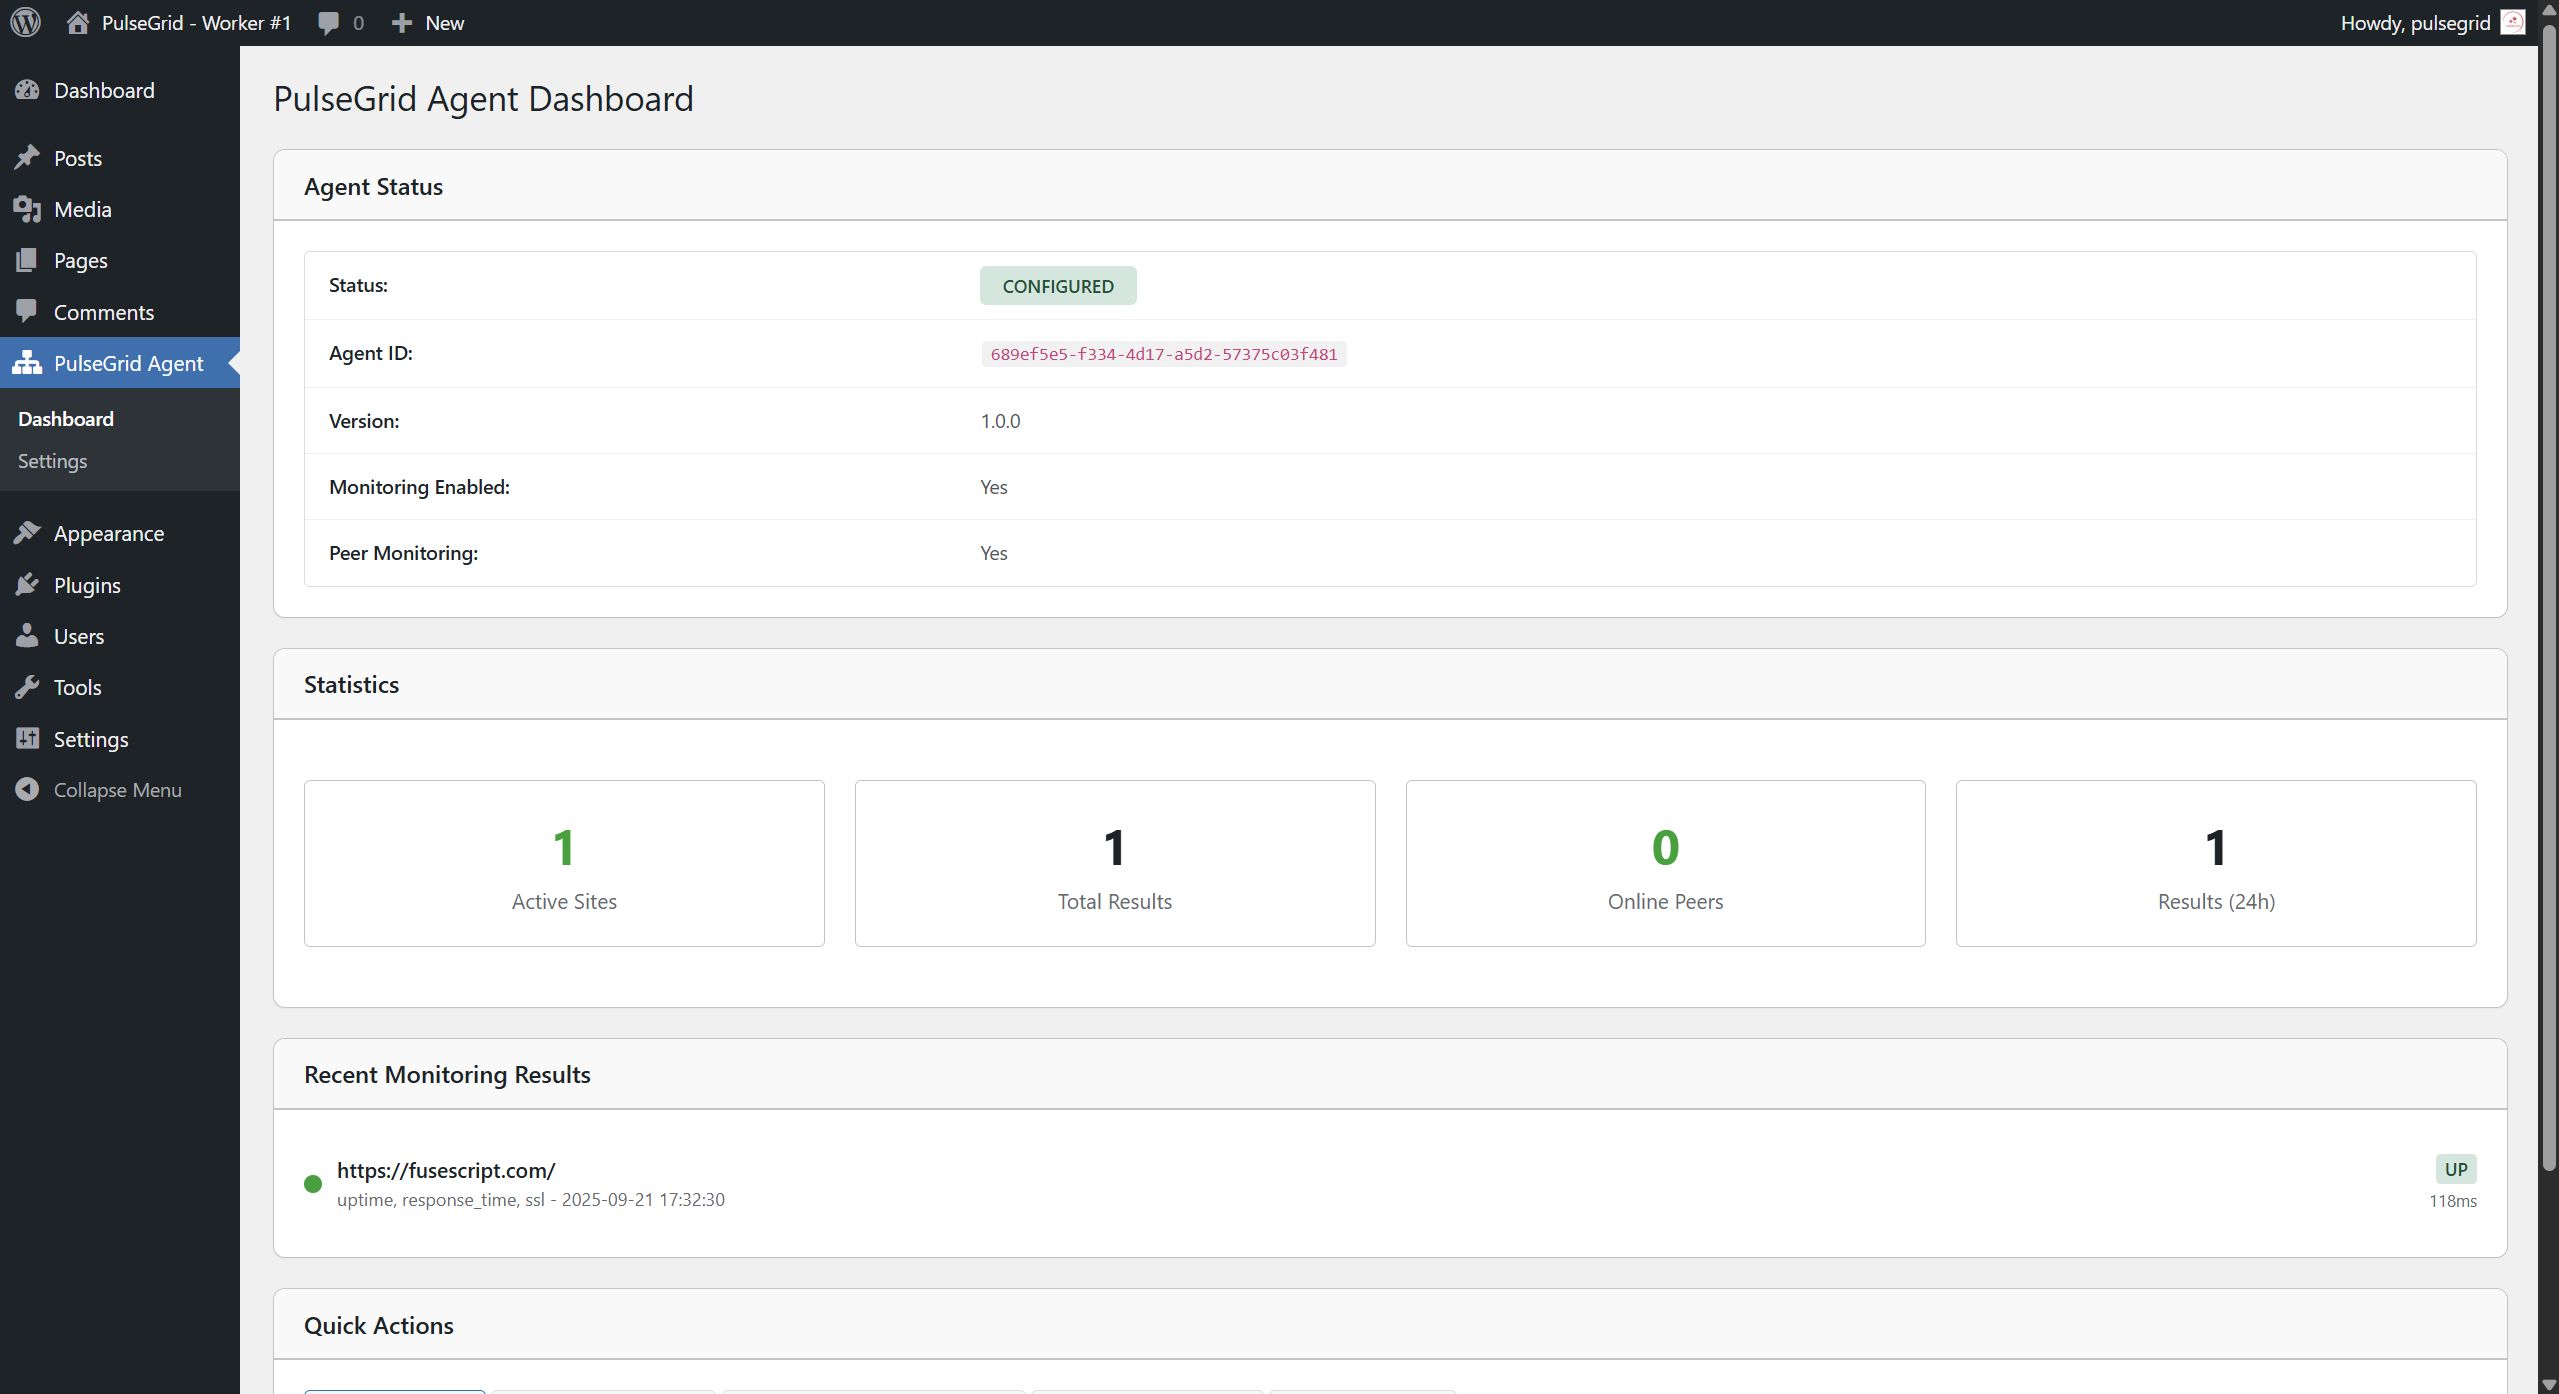
Dashboard Overview
- PulseGrid -> Dashboard provides:
- Active workers count
- Total monitored sites
- Average uptime percentage
- Recent alerts and status changes
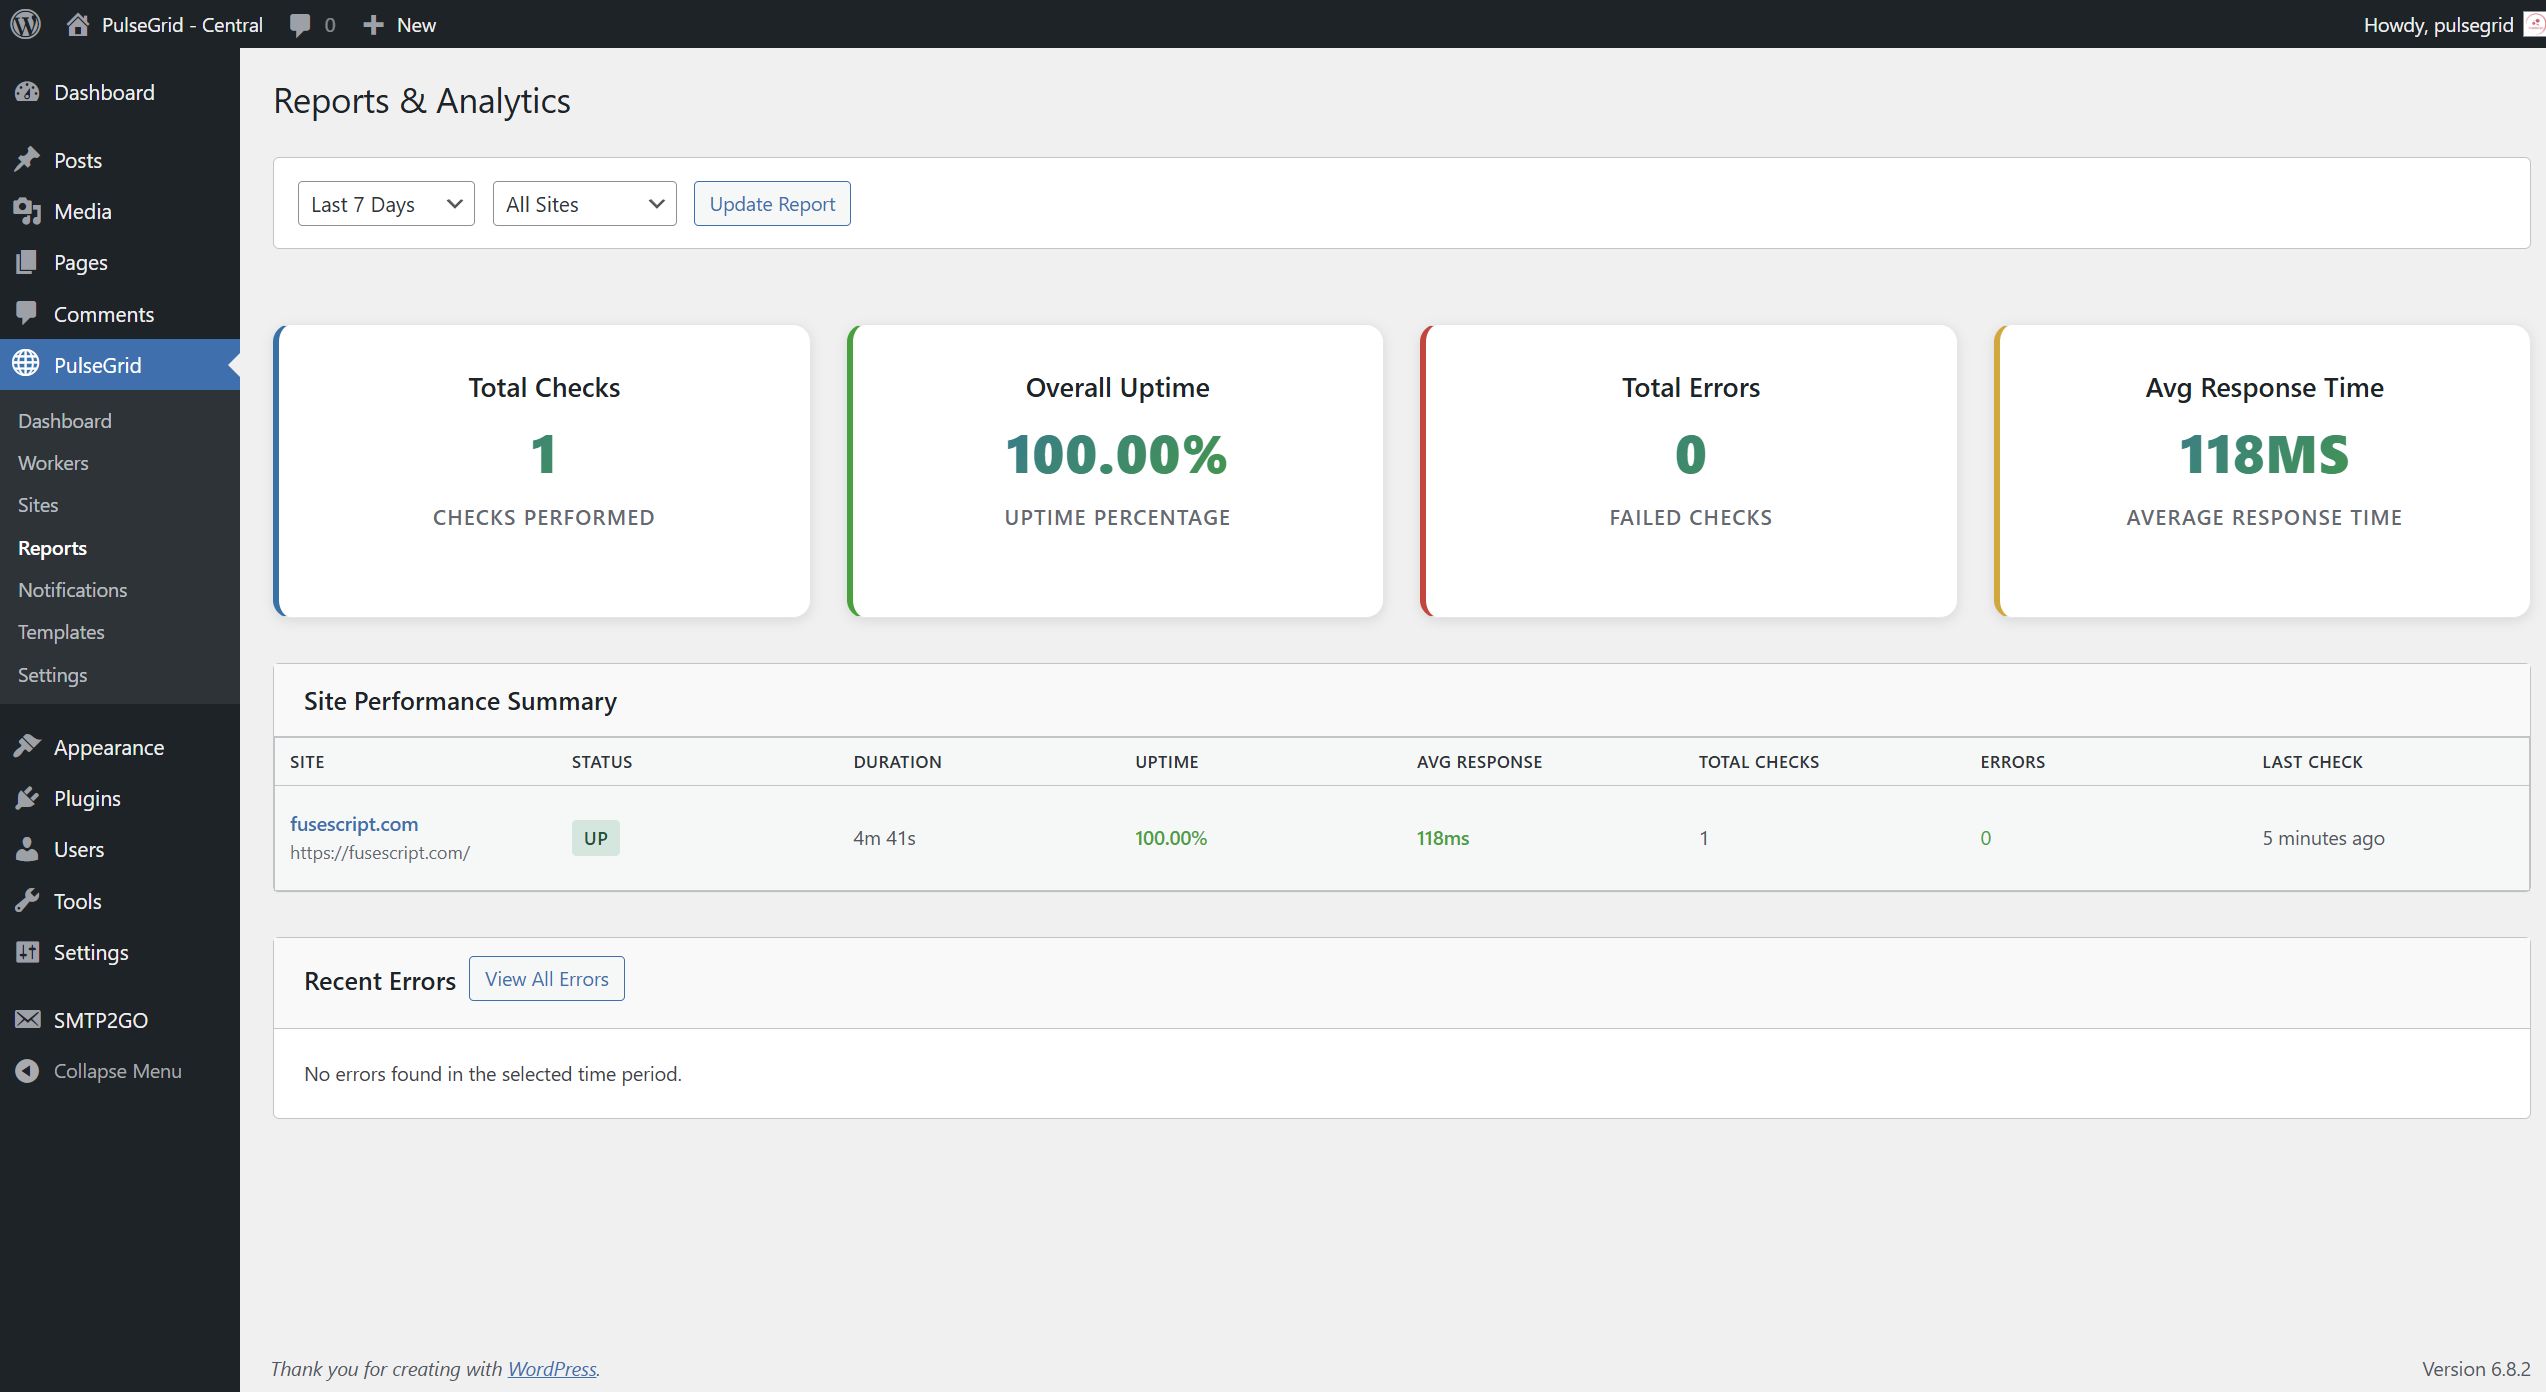
Detailed Reports
- Go to PulseGrid -> Reports for:
- Uptime Statistics: Site availability over time periods
- Response Time Trends: Performance monitoring data
H) Advanced Configuration
Advanced settings for power users and enterprise deployments.
Distributed Verification
- Consensus Threshold: Number of agents that must confirm downtime before alerting
Performance Tuning
- Check Intervals: Balance between monitoring frequency and server load
- Worker Limits: Optimise site distribution across agents
Security Hardening
- HTTPS Enforcement: Require encrypted communication
- Network Key Rotation: Periodically update encryption keys
- API Key Management: Secure worker authentication
| Category | Plugins / WordPress / Miscellaneous |
| First release | 22 September 2025 |
| Last update | 22 September 2025 |
| Supported CMS | WordPress 6.5, WordPress 6.6, WordPress 6.7, WordPress 6.8 |
| Files included | .php, .css, Javascript .js |
| Tags | monitor, uptime monitor, uptime, website uptime, website uptime monitor |